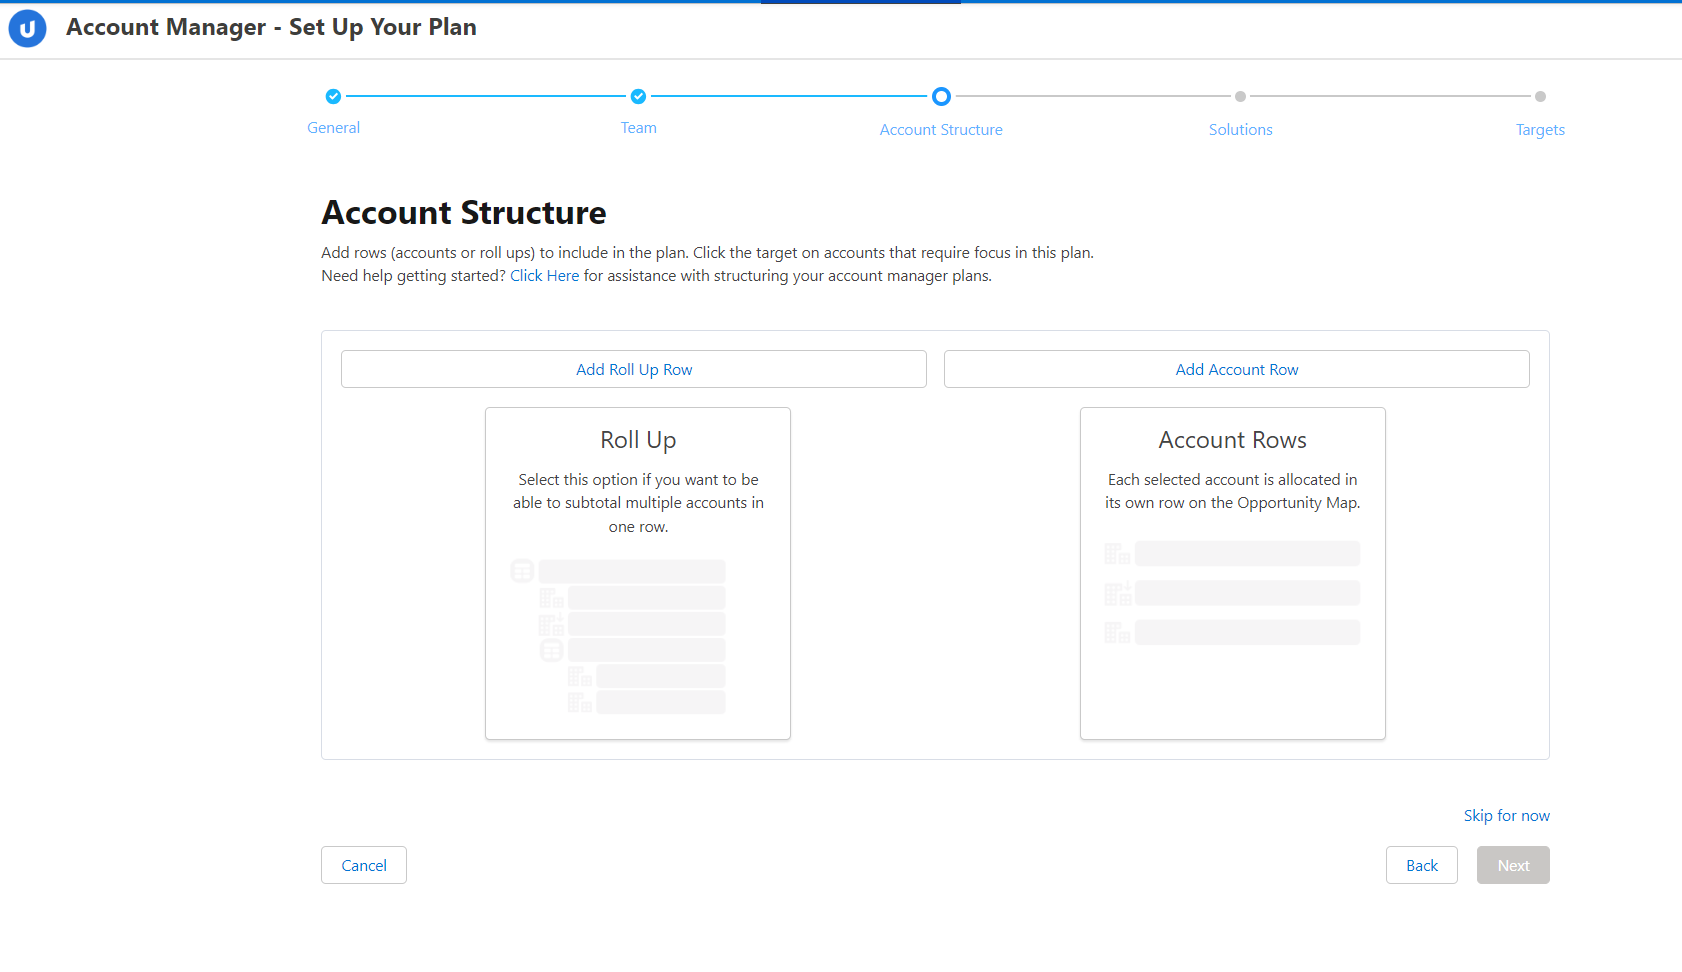
Account Structure (AM Plan Set Up)
The Account Structure page (shown below in plan creation mode) is where you add accounts to the plan – "where you are selling to". Each selected account and division is allocated a row on the opportunity map.
This topic covers the following areas:
There are two ways to build your Account Manager plan. You can apply both methods in your plan if required.
-
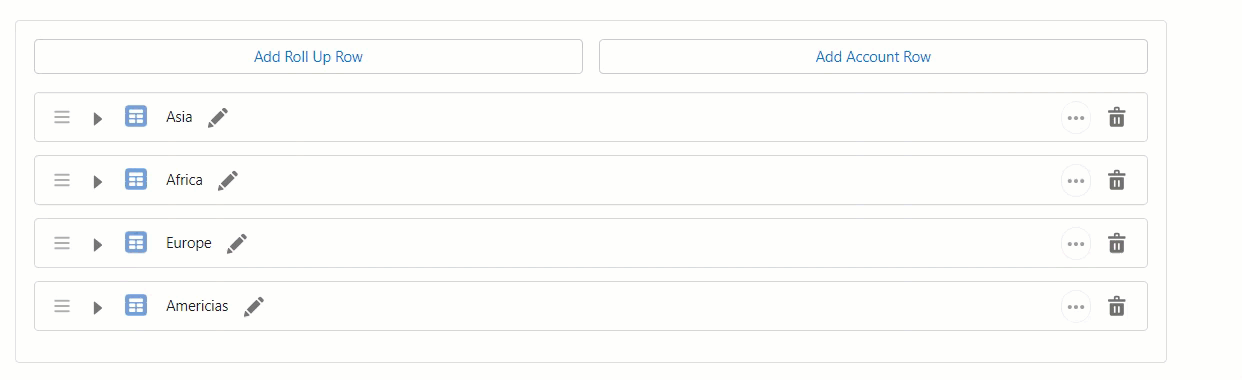
A Roll Up Row is an expandable row in your opportunity map.
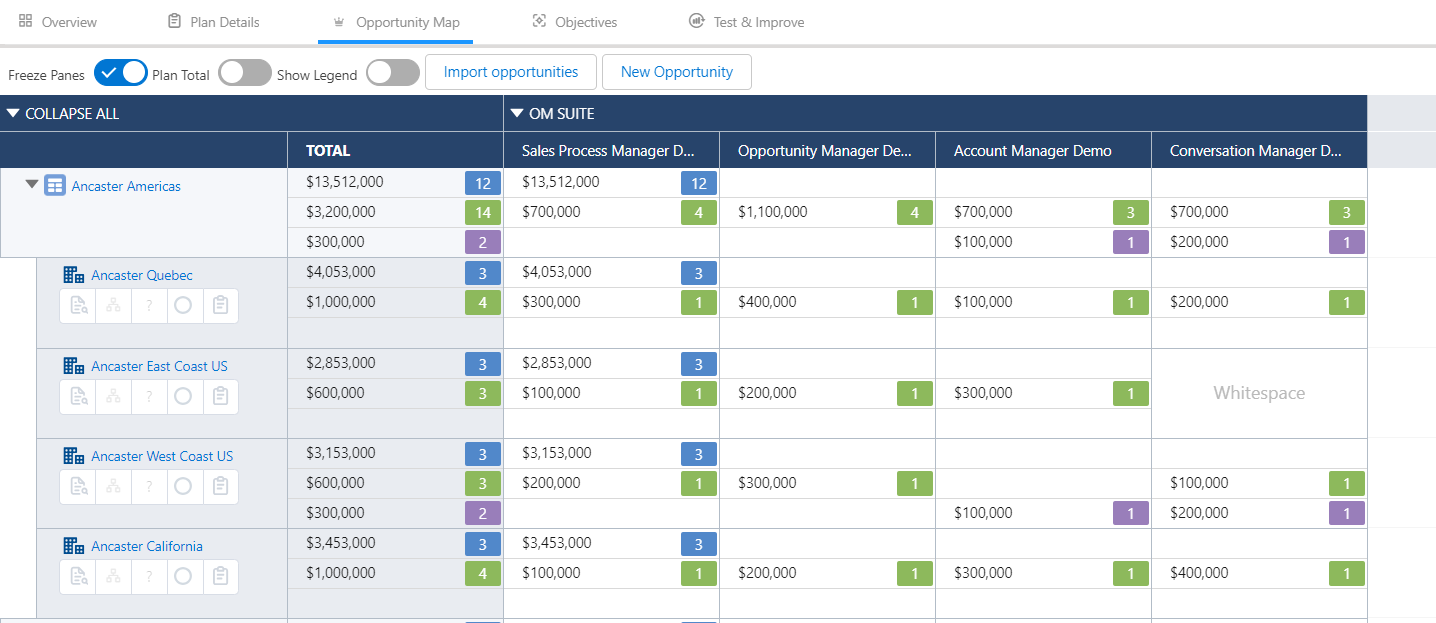
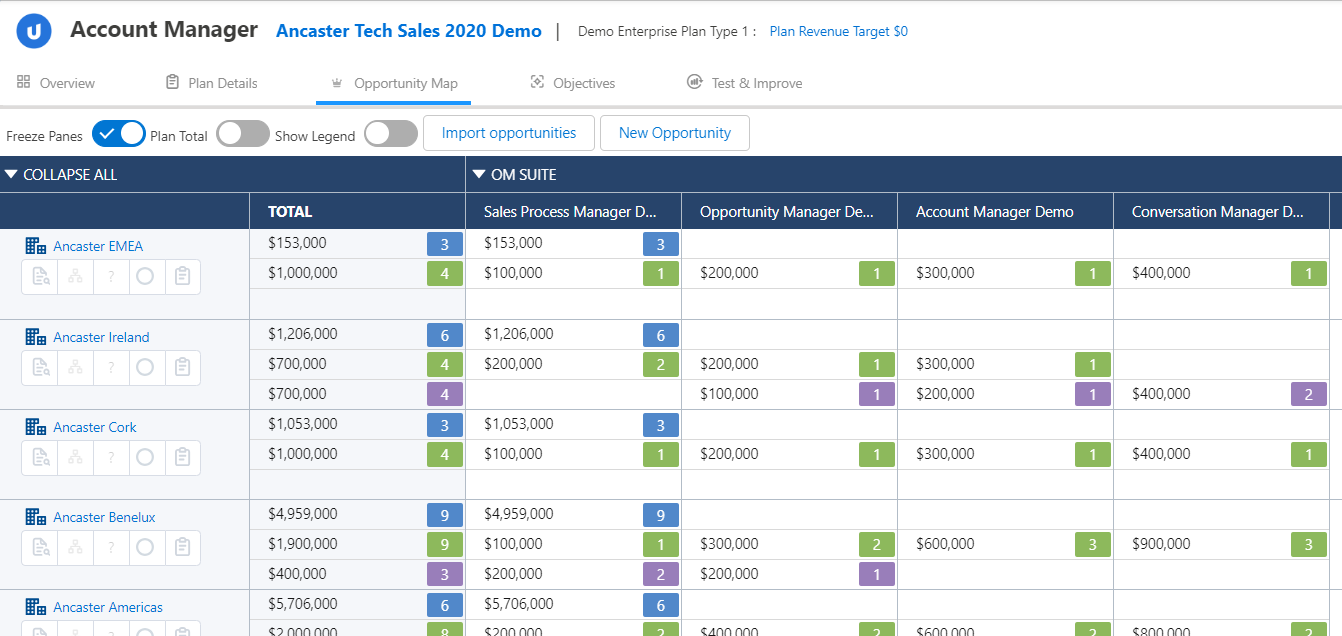
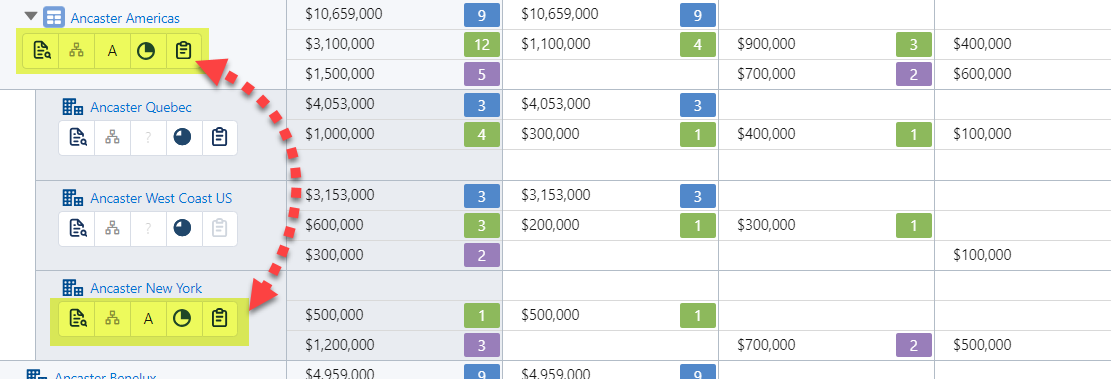
For example, if you wanted to take a geographic approach and include a summary view in your plan of a selection of North American accounts, you could create a roll up row for the continent (as in 'Ancaster Americas' in the example shown below) and then select the accounts (and divisions) you wish to include within that. The roll up provides a sub-total of the opportunities on the account and division rows that it contains (including accounts and divisions within child roll up rows).
Alternatively, you might decide to create a roll up row corresponding to a vertical market, a set of accounts within an enterprise organization or accounts of a certain type.
-
Your other option is to simply add accounts as a standalone rows - as shown in the example portfolio plan below.
Take a look at How should I structure my Account Manager plan? if you need help deciding on a structure for your Account Manager plan.
Adding a roll up row
- Click Add Roll Up Row.
-
Name your roll up and click the check mark symbol
 to save it.
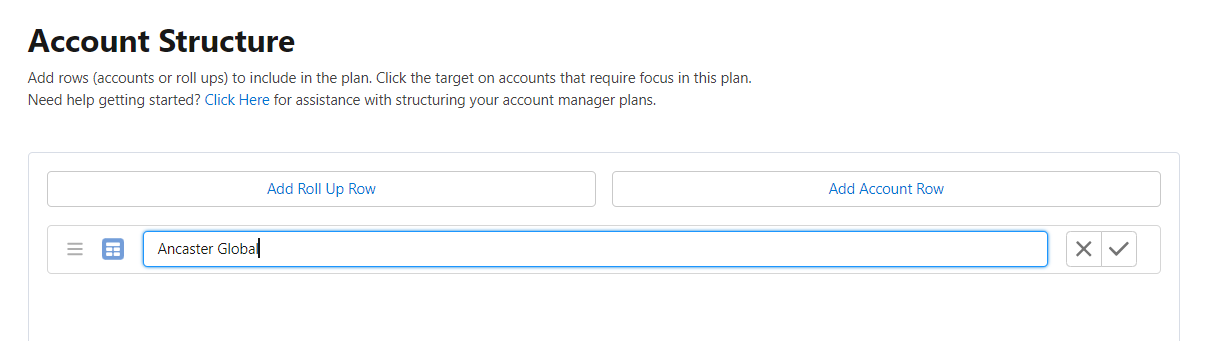
A roll up row is represented in your account structure by the following icon:

-
Click the options menu
 and select one of the following:
-
Add Roll Up Row - you can create roll ups within a roll up.
-
Add Account Row - add account rows to your roll up.
-
Add Division Row - add division rows within your roll up.
-
Plan Using* - nominate an account or division to plan against on the roll up row.
-
Hide Rows* - hide the rows within the roll up (so that only summary data is displayed on the opportunity map).
Note: *the options Plan Using and Hide Rows are available once you have added an account or division row to your roll up.
Add roll up within a roll up
Add a new roll up inside the roll up you just created. Three levels of roll up are allowed (e.g. Ancaster EMEA > Ancaster Europe > Ancaster Benelux).
Note: The same account or division row can be added multiple times to an Account Manager plan, so long as each instance is in a different roll up.
Add account row within a roll up
Add one or more account rows within the roll up.
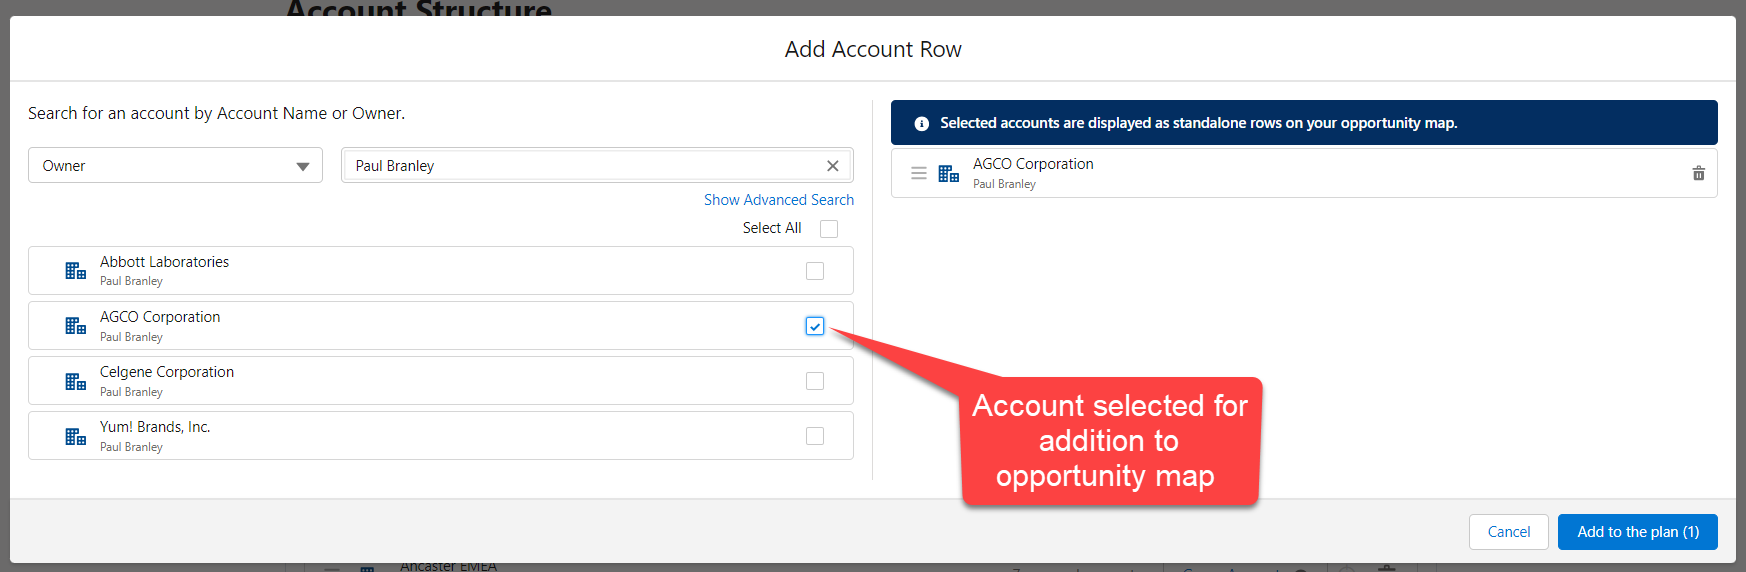
On the Add Account Row dialog that is displayed, you can search accounts to add by Account Name or Owner.
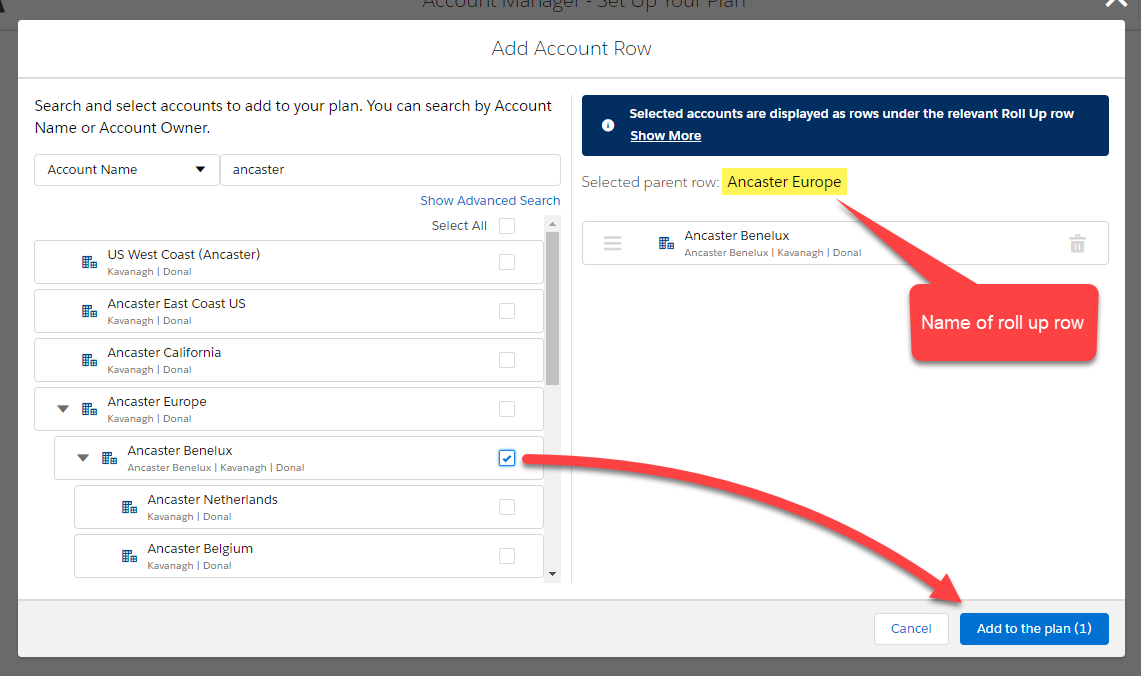
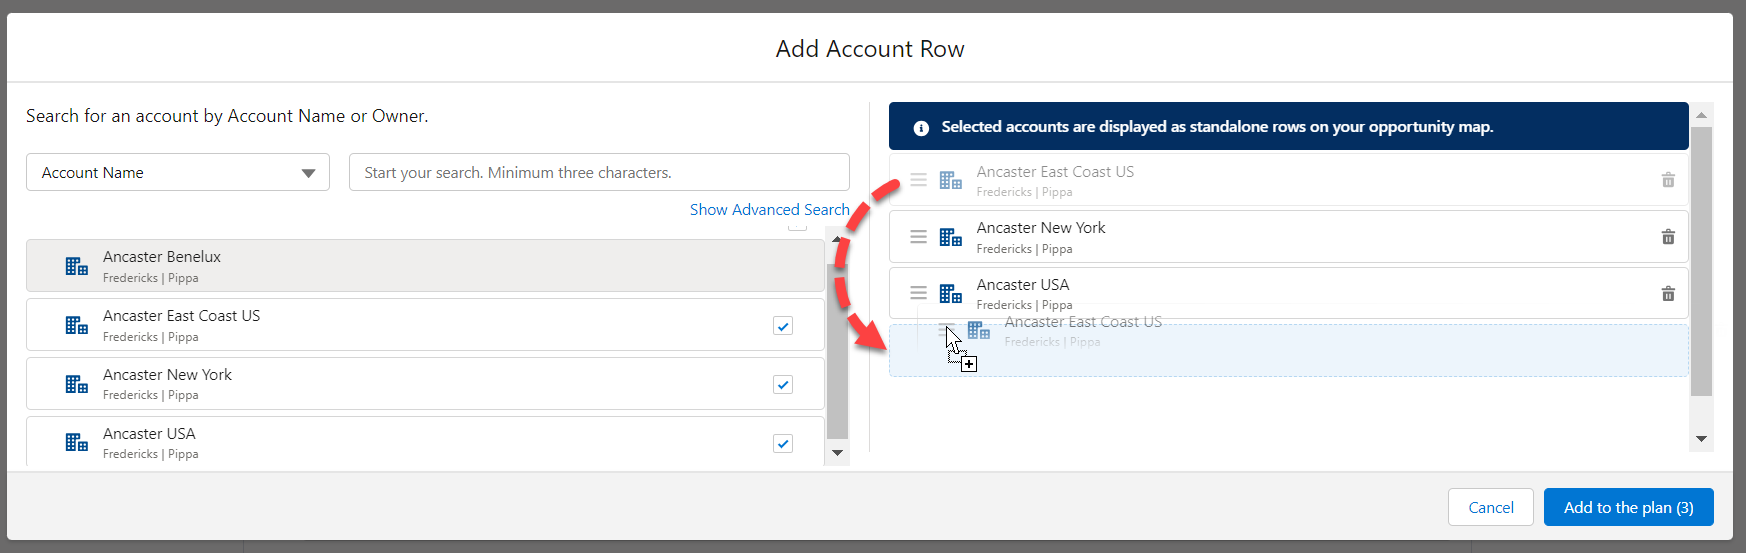
If you select more than one account, you can reorder how they will appear in your roll up using drag and drop (as shown in the example below).
An advanced search option (Show Advanced Search - highlighted below) provides additional search criteria for you to identify and select the correct accounts.

See Advanced Searching in AM Plan Setup for help using this option.
Click Add to the plan (#) when you have selected the required accounts.
An account row is represented in your account structure by the following icon:

Add division row
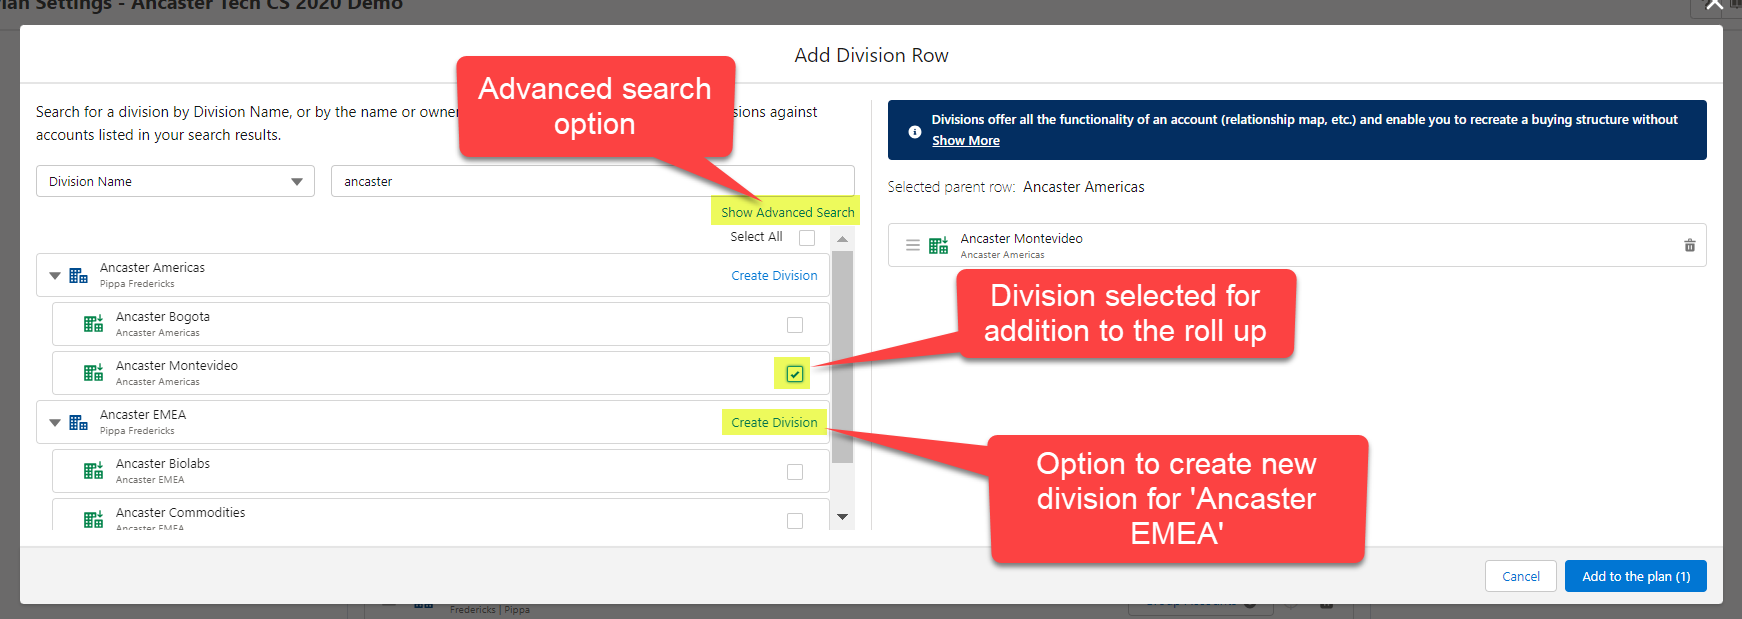
Add one or more divisions within the roll up. On the Add Division Row window that is displayed, you can search divisions to add by Division Name, Account Name or account Owner. The advanced search option (Show Advanced Search - highlighted in image below) allows you perform an advanced search of accounts and add the divisions of accounts that are displayed in your search results. See Using advanced search to add or create division rows for help using this option.
Alternatively, you can create a new division (Create Division - also highlighted below) for any account in your standard or advanced search results and add it to your roll up row.
If you are adding more than one division, you can reorder how they will appear in your roll up using drag and drop (as shown in the example below).
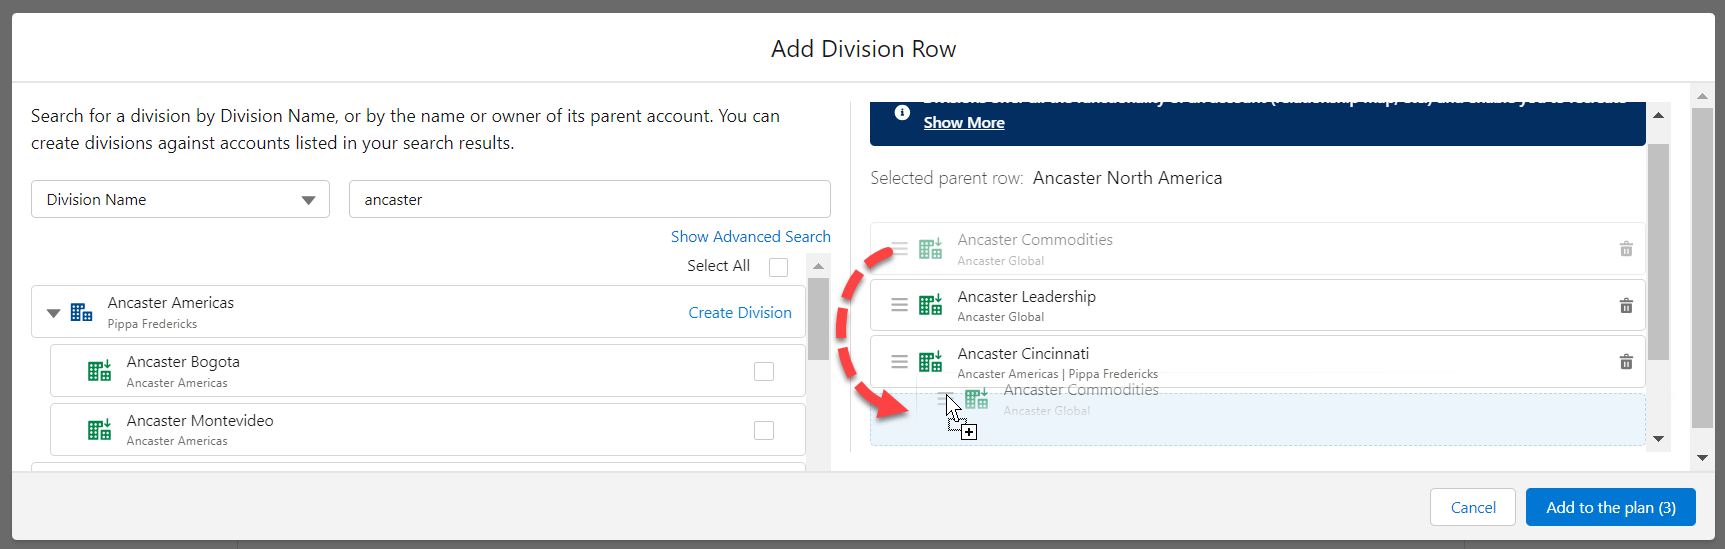
Click Add to the plan (#) when you have created/selected the required divisions.
A division row is represented in your account structure by the following icon:

Note: If you create a new division, it becomes available to other users who are creating or editing an account plan. For more information, see Creating Account Divisions.
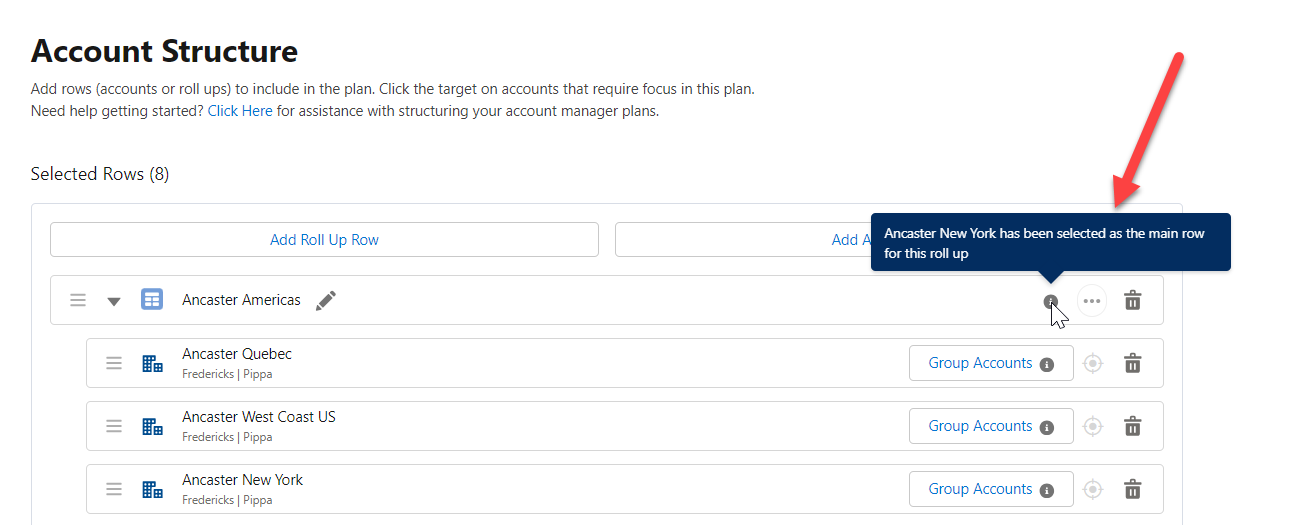
Plan using
Nominate an account or division within the roll up that you want to plan against. In effect, this means that the options shown for this account or division on the opportunity map are also shown up on the roll up row.
In the example displayed below, Ancaster New York is set as the main row for planning in the Ancaster Americas roll up (e.g. clicking the insights icon on the Ancaster America row opens the insight map for Ancaster New York).
If an account or division is nominated for the roll up row, the information is flagged on the Account Structure page - as shown below:
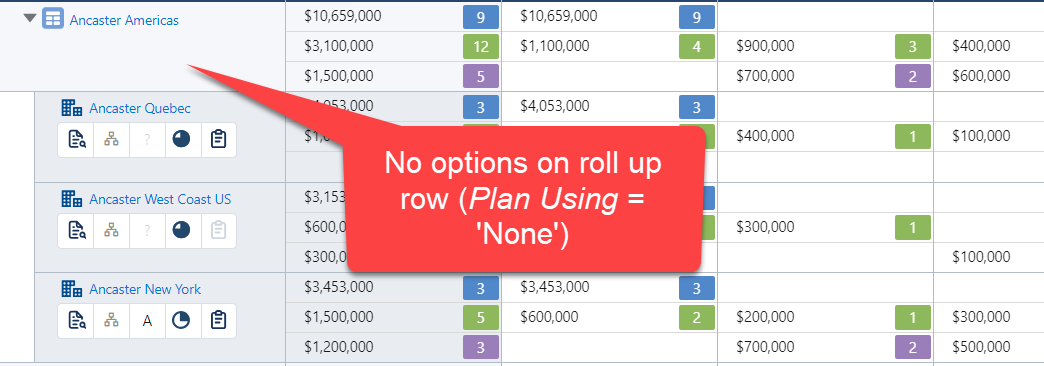
If no account or division is selected (Plan Using = 'None'), options are not provided on the roll up row.
Hide rows
Enable this setting to hide all rows within a roll up. Only the roll up row is displayed on the opportunity map, and it continues to show the opportunity subtotals for the account and division rows it contains.
-
Adding an account row
To add a standalone account row to your opportunity map, do the following:
-
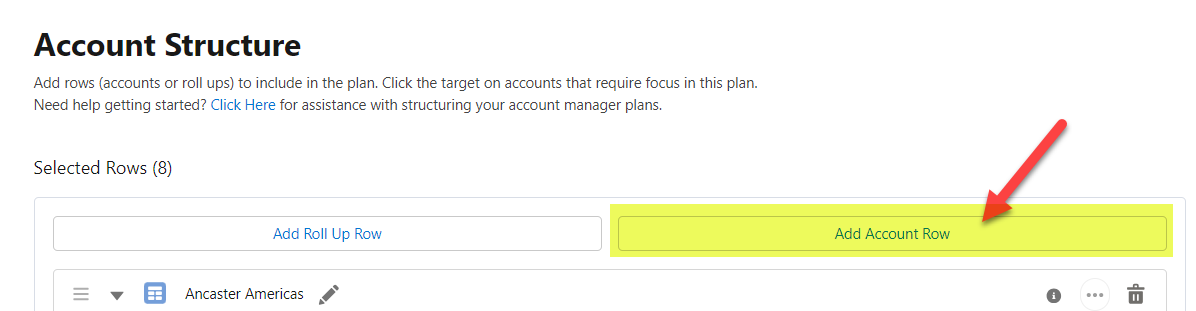
Click Add Account Row on the Account Structure page.
-
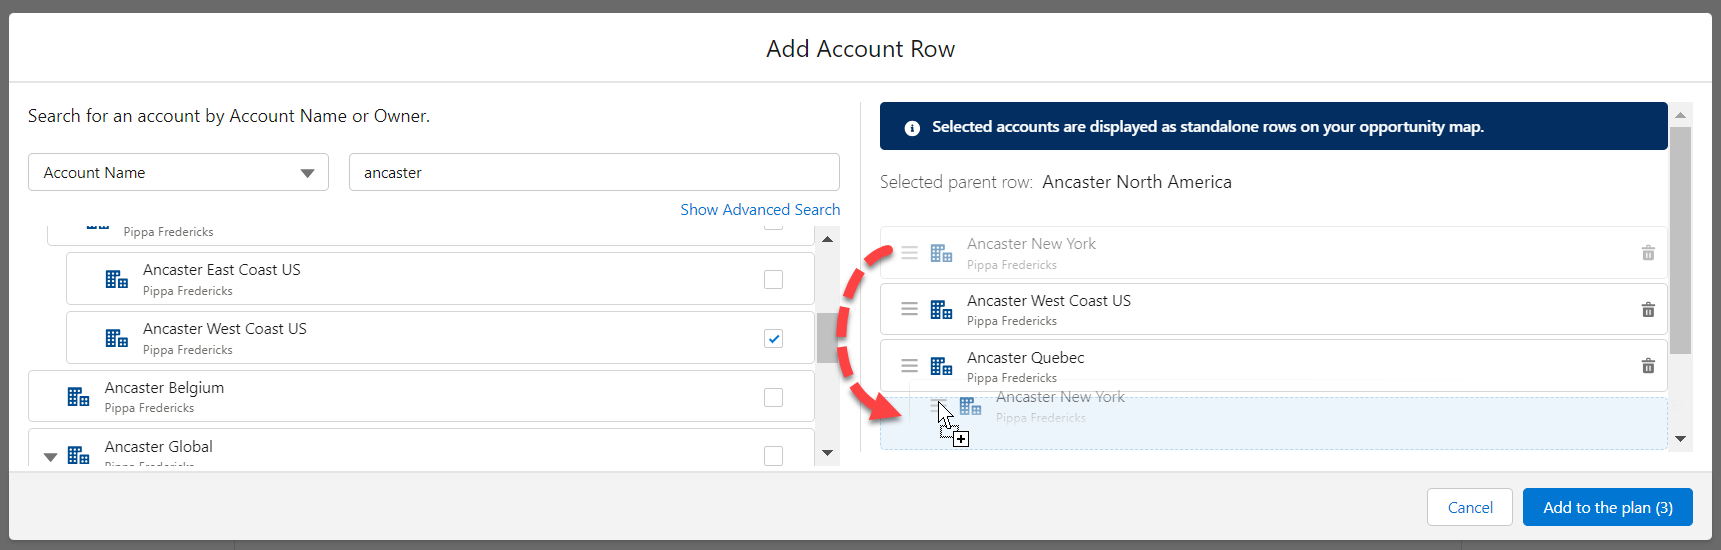
On the Add Account Row dialog that is displayed, you can search accounts to add by Account Name or Owner.
If you select more than one account, you can reorder how they will appear in your plan using drag and drop (as shown in the example below).
An advanced search option (Show Advanced Search - highlighted below) provides additional search criteria for you to identify and select the correct accounts. See Advanced Searching in AM Plan Setup for help using this option.
-
Click Add to the plan (#) when you have selected the required accounts.
An account row is represented in your account structure by the following icon: ![]()
Each account that you add will be displayed as a distinct row on the opportunity map.
Rearranging rows
The order in which roll ups, accounts and divisions are arranged on the Account Structure page determines their order on the opportunity map.
To change the order of the rows, drag them to their desired positions - as shown in the example below.
Hover your cursor over the image to view the video.
You can also drag and drop rows within a roll up row but you can't drag a row in or out of a roll up.
Removing a row
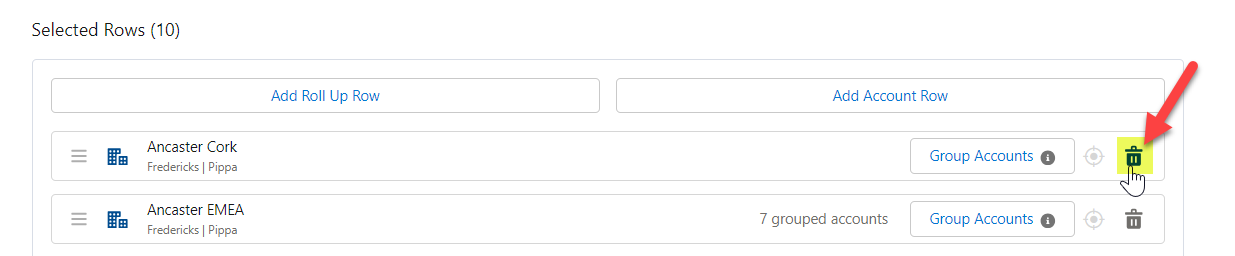
To remove an account, division or roll up row, click its trashcan icon - as indicated in the example below.
Targeting an account row
To mark an account row for particular focus, click its Target icon (highlighted in the example below).
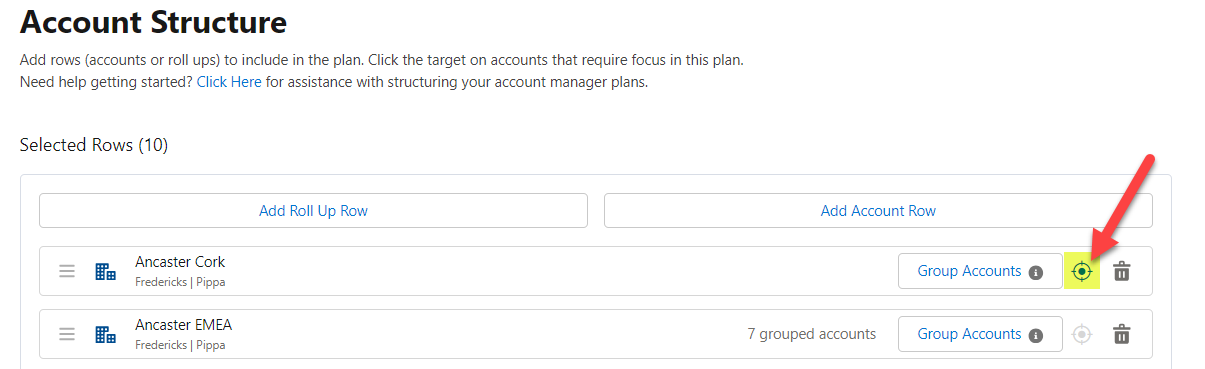
Tip: Be selective in how you target accounts. Avoid targeting all the accounts included in your plan.
Grouping accounts
The Group Accounts button on account rows allows you to group duplicate accounts on a single row in your opportunity map. When two or more accounts are grouped, you can add opportunities from any of the grouped accounts on the row in question.
The number of grouped accounts on a row is indicated by the message '# grouped accounts', as shown in the example below.

Note: If you have parent and child accounts in your Salesforce org, a parent and its child accounts are automatically grouped in Altify Account Manager.
To access the editor, click the Group Accounts button on the relevant row. For more information, see Manual Account Grouping.
Click Next once you are finished structuring your new Account Manager plan, or Save if you are implementing changes to the structure of an existing plan in Plan Settings.