An advanced search option is available in the following scenarios when organizing the Account Structure of your Account Manager plan:
-
searching for accounts and divisions to add. (For specific guidance on advance searching for divisions, see Using advanced search to add or create division rows)
-
searching for accounts to group on a single row
The example below shows the advanced search feature when you are searching for an account to add to your plan.
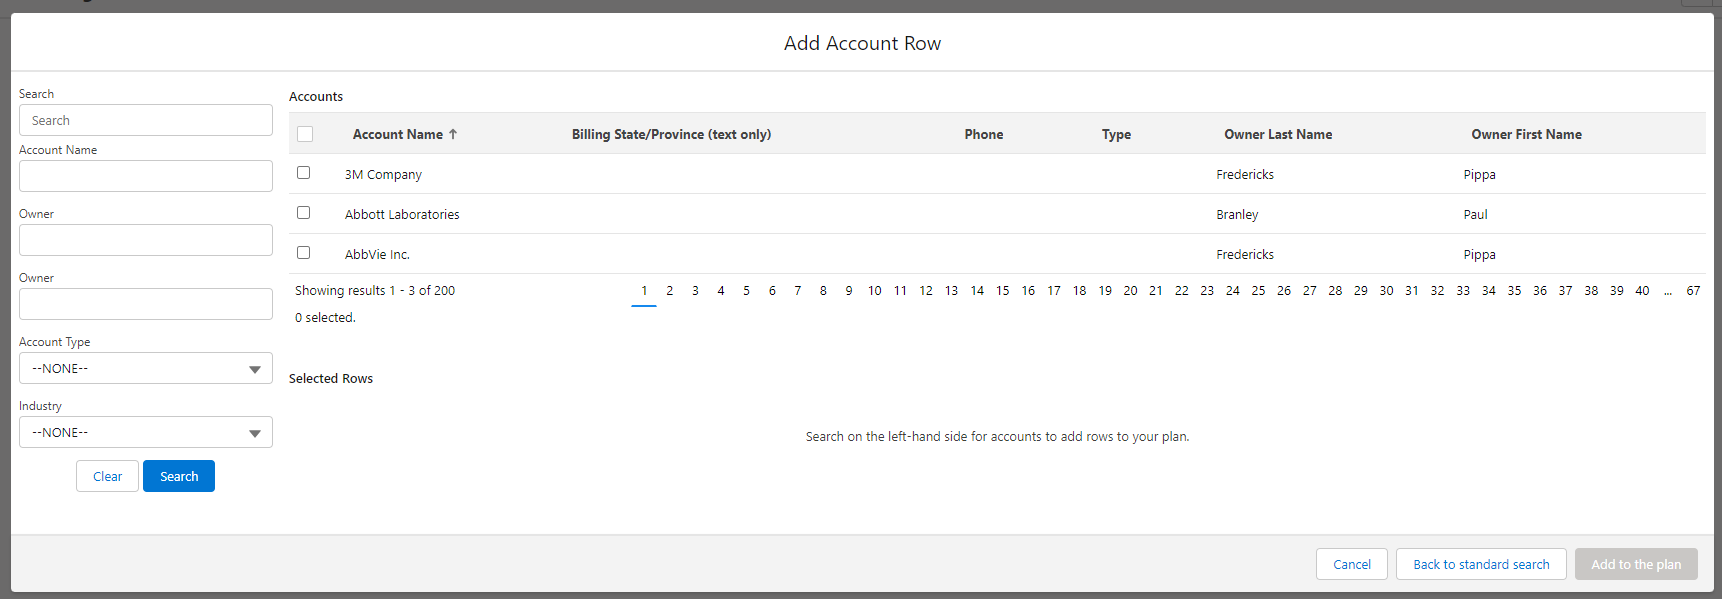
Note: The search criteria shown in the image above is the default configuration of this advanced search. Your administrator can reconfigure advanced searching if required. This includes adding up to 10 search fields and determining which columns are displayed in the search results.
Whether you are adding or grouping accounts, the advance search tool allows you to select multiple or all accounts in the search results. As you select each account, it appears in the Selected Rows section.
(If you are grouping accounts, the parent account and any child accounts from the Salesforce account hierarchy will automatically appear in the Selected Rows section. Likewise, any accounts you selected in the standard search will appear in the Selected Rows section.)
Click Save group (#)/Add to the plan (#) when you are happy with the accounts that you are adding to the plan/grouping.
Alternatively, the Back to standard search(#) button allows you to return to the initial search dialog while retaining your selection (which are not yet added to the plan/grouped).
The following are some issues to note when you are performing an advanced search:
- In text fields, partial search terms are allowed. For example, searching for 'Anc' will return all accounts with 'Anc' in the name, such as 'Ancaster Engineering'.
- The Search field searches Account Names only.
- Reorder search results by clicking the relevant column header.
Using advanced search to add or create division rows
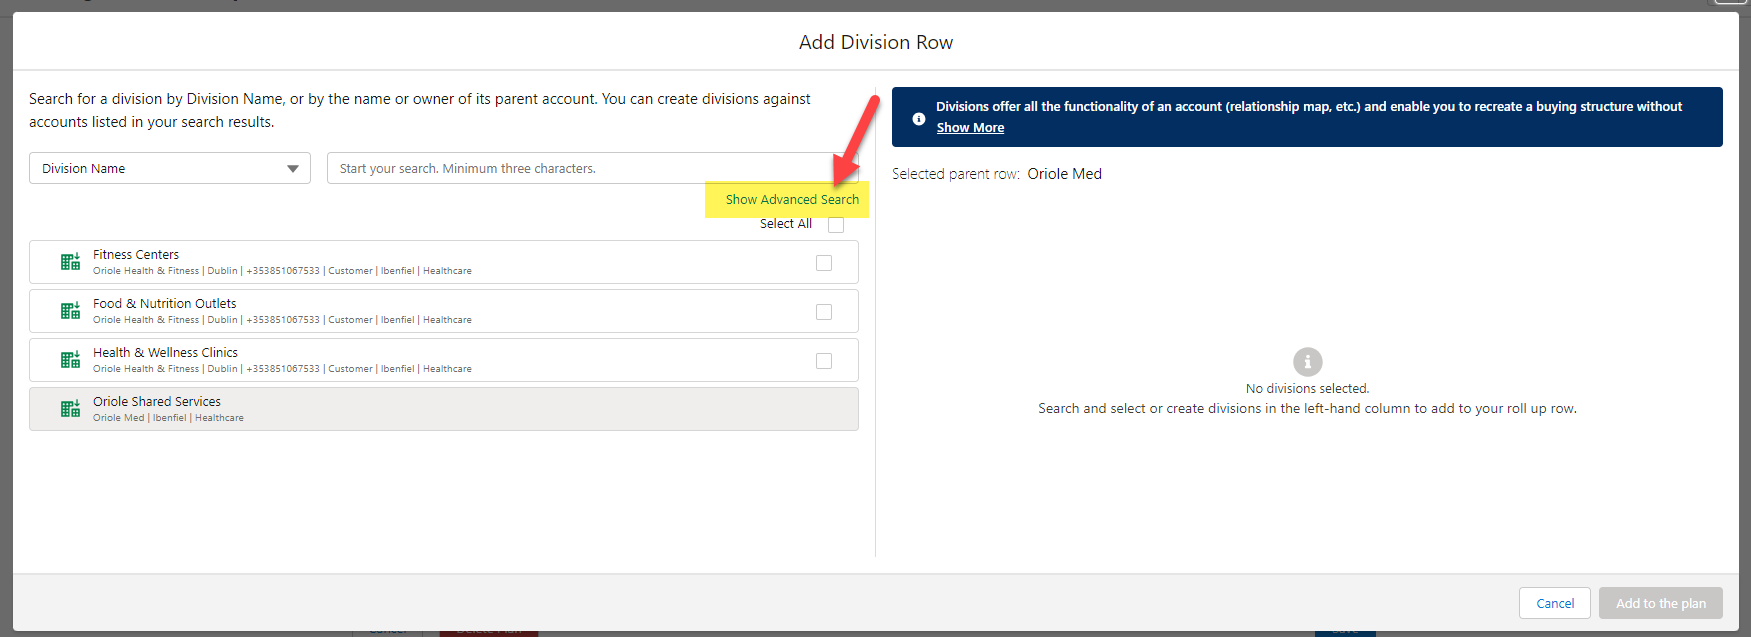
Using the advanced search, you can search for accounts and add their divisions to the roll up, or create a new division against an account in your search results and add it to the roll up.
-
On the Add Division Row dialog, click Show Advanced Search.
-
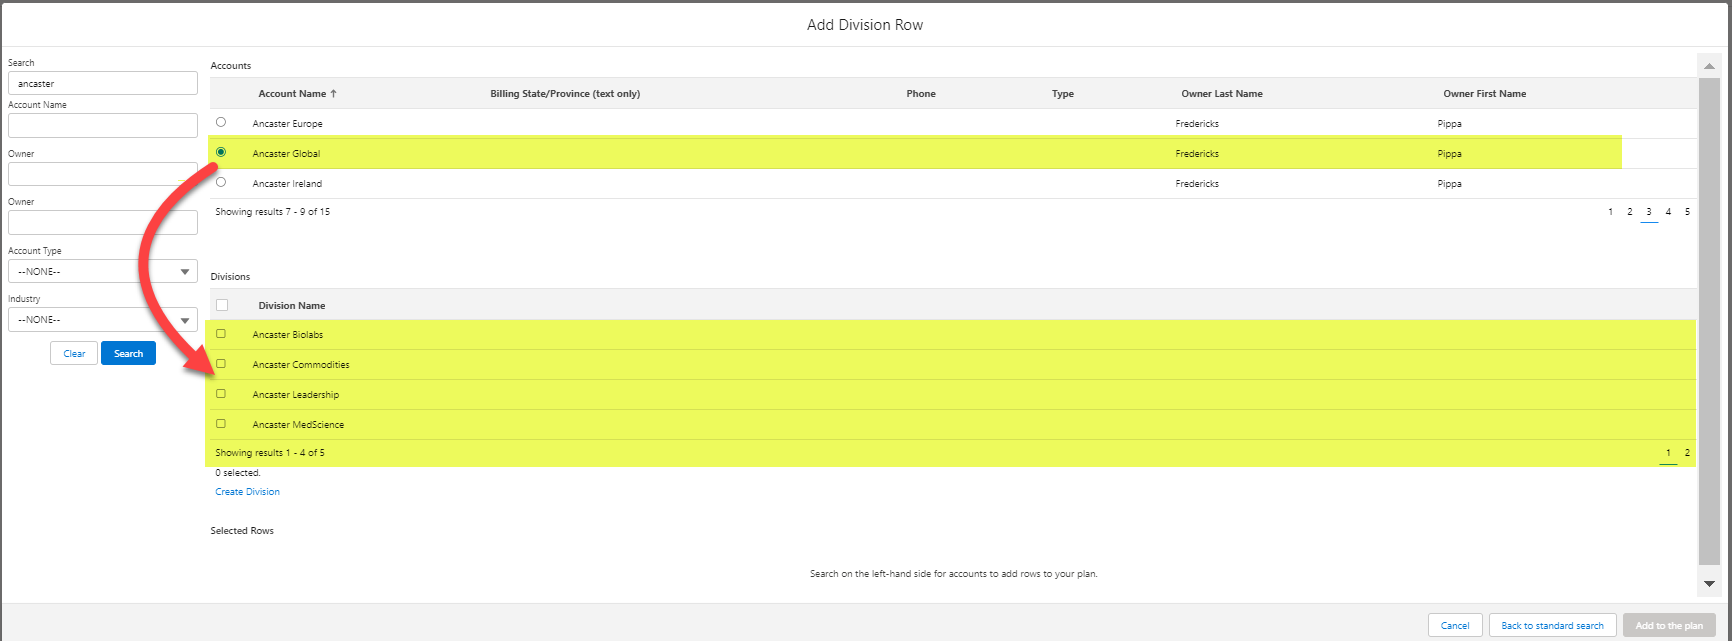
On the advanced search page, enter your account search criteria in the left-hand column and click Search.
-
Select an account in the Accounts search results table to see its associated divisions. In the example shown below, 'Ancaster Global' is selected and its three divisions are displayed.
-
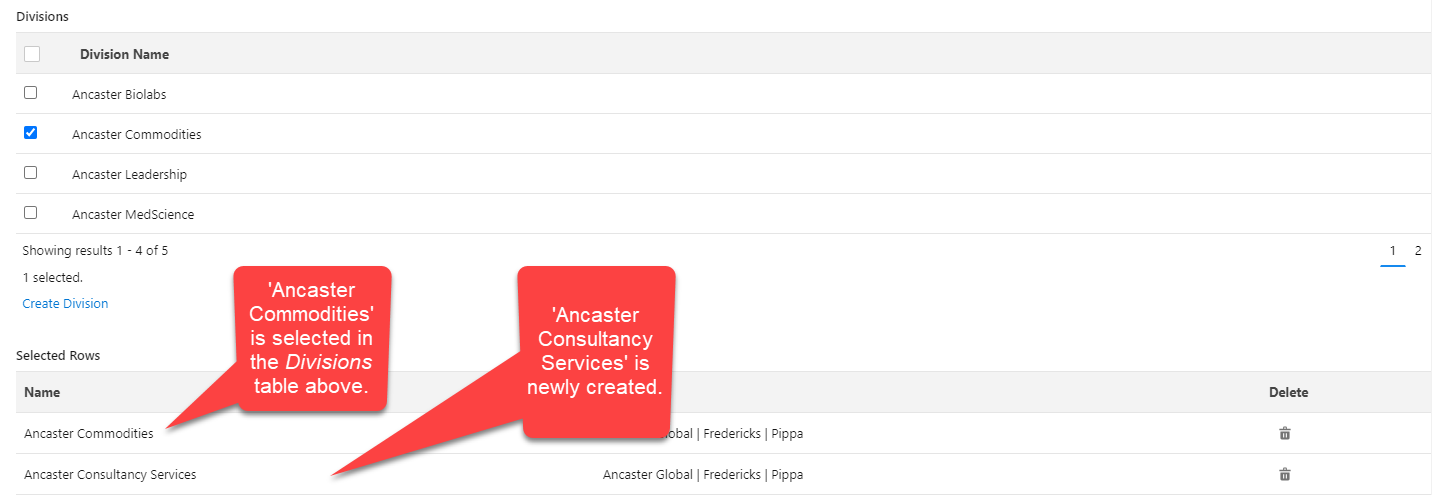
Select a division in the Divisions table to add to your roll up, or click Create Division to create a new division for the selected account.
Selected and created divisions appear in the Selected Rows table. Selected rows are not added to the roll up until you click the Add to the plan (#) button.
-
Continue searching accounts and adding or creating divisions if required. The Selected Rows table keeps track of the divisions that you have selected.
-
Click Add to the plan (#) when you are happy with the divisions that you are adding to the roll up row.
Alternatively, the Back to the standard search(#) button allows you to return to the initial Add Division Row dialog while retaining your selection (which are not yet added to the roll up).