This topic explains how to add current or won opportunities to
Note: With regard to won opportunities, only those closed within the duration of your plan can be added to the opportunity map.
-
Click the green cell (for Current) or purple cell (for Won) in the relevant intersection.
If you are adding an opportunity to a whitespace, click the + Add button and select the Current or Won tab as appropriate in the intersection dialog.
This opens the relevant tab on the intersection dialog (Current in the example shown below).
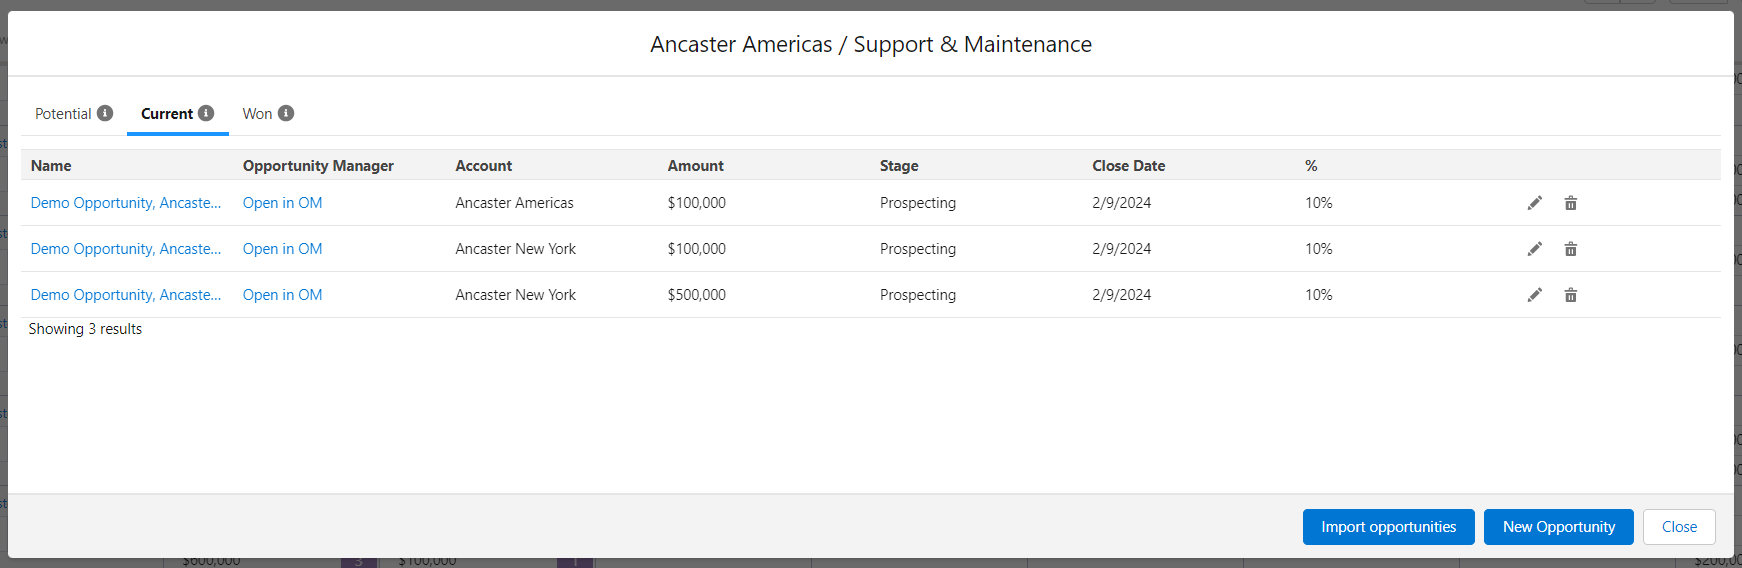
It lists the current or won opportunities that are already added to the map for the relevant account/division row and solution (or any solution if you clicked into a cell in the Total column).
If you clicked on the roll up row, opportunities are listed for all account and division rows within the roll up.
-
If the current or won opportunity you are adding does not yet exist in your Salesforce org, click New Opportunity.
In the Create Opportunity dialog,
Note: The New Opportunity button can be hidden by your administrator - in which case you are restricted to adding opportunities that are already created in Salesforce (as described below).
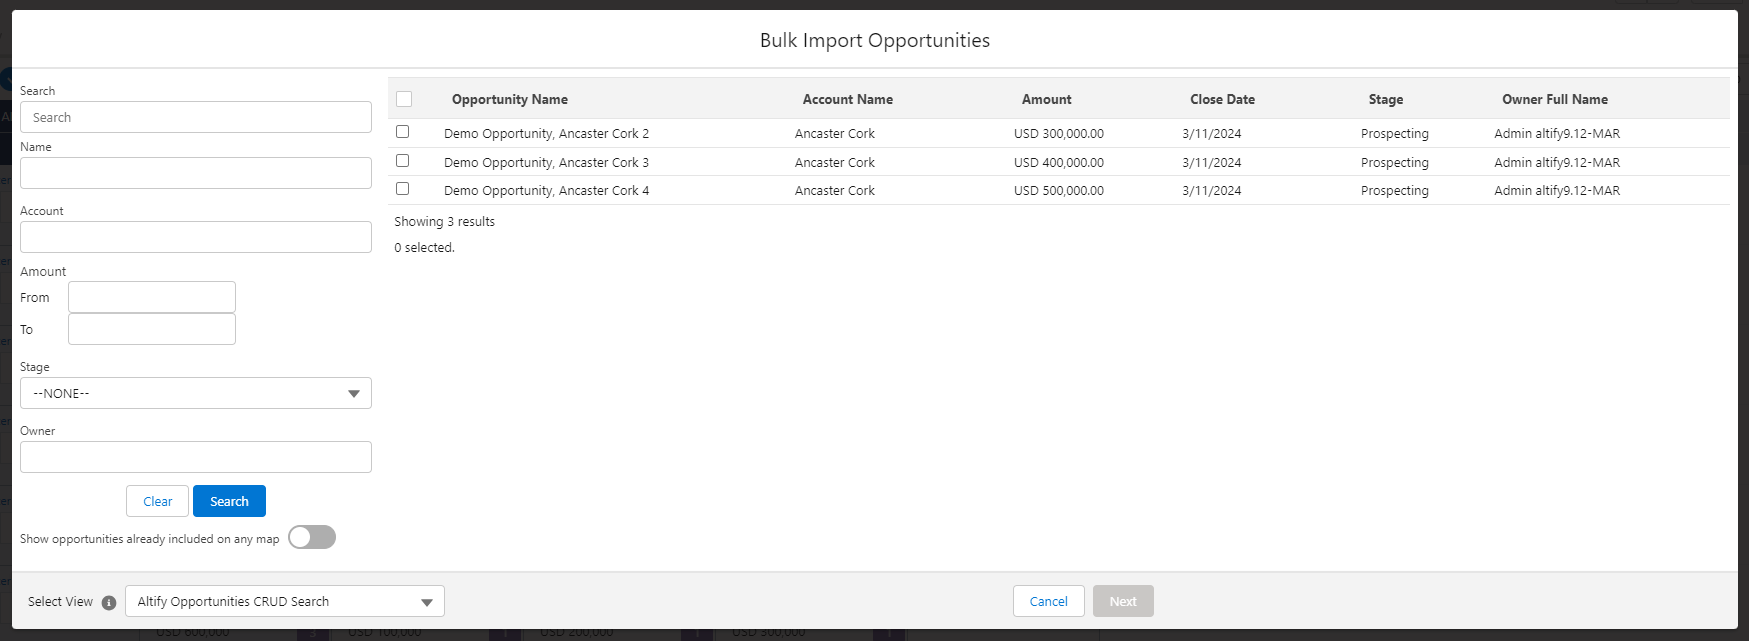
If you are adding opportunities that already exist in your Salesforce org, click Import opportunities to search for the opportunity or opportunities that you want to add.
-
Search for the current or won opportunities that you want to add to the
Activate the Show opportunities already included on any map toggle to include opportunities that are already displayed on your map in your search results. (These opportunities cannot be selected).
Use the Select View drop-down menu to choose another set of criteria by which to search the opportunities.
Tip: If you are not seeing an opportunity that you expected to see, consider the following:
-
In a search for current opportunities, you see all matching opportunities, even those outside the date range of the Account Manager plan. In a search for won opportunities, you only see matching opportunities with a close date within the plan duration. You can update the duration on the Targets tab in Plan Settings.
-
Is the account included in your Account Manager plan? To check go to the Account Structure tab in Plan Settings.
-
-
Select the opportunity or opportunities you want to add to the intersection and click Next.
-
On the next dialog, you can confirm the intersection of Solution (column) and account/division (Row) where you would like each of your selected opportunities to appear. The Row field is active in the following scenarios:
- Where an account or division appears more than once on the opportunity map. Select the appropriate row using the drop-down.
- Where parent and child account rows (as defined by the Salesforce hierarchy or Altify account grouping) are on the opportunity map.
- Where an account has divisions (Oriole Health & Fitness in the example below). Select a division or the account row using the drop-down.
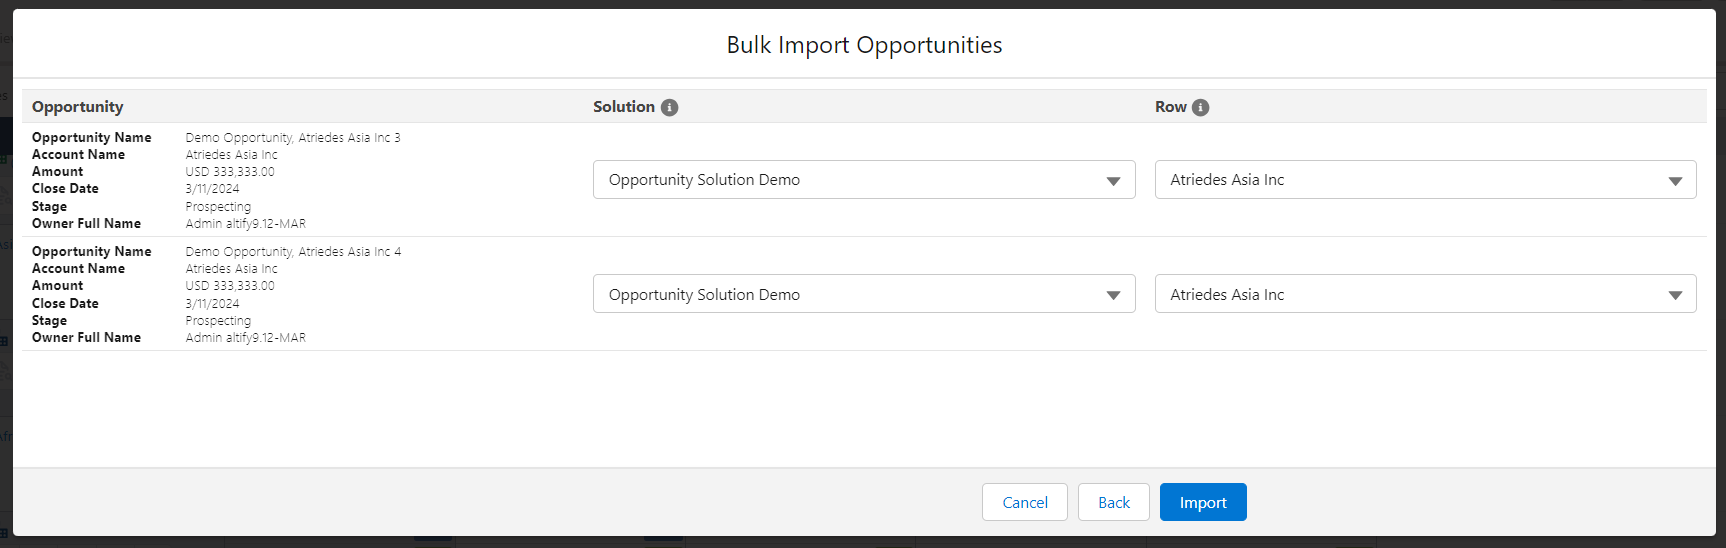
Note: If product–solution mapping is configured, and the opportunity contains product line items, it will be auto-mapped to solutions.
- Click Import.
The Bulk Import Opportunities dialog displays opportunities for the relevant account (or accounts in the case of an account group). If you are importing through the roll up row, opportunities for all accounts within the roll up are displayed.