TeamView comes with five preconfigured Plan Status fields which can be added to your views. Each of these corresponds to one of the Plan Status icons shown in the TeamView details area.
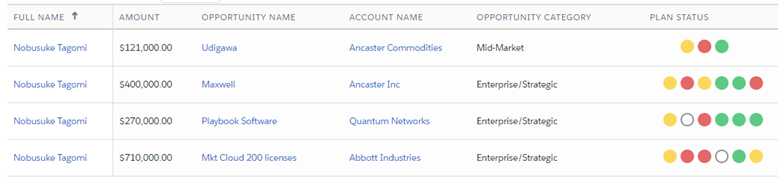
You can also add your own custom Plan Status icons. For each one, this involves setting up a field that has the following possible Text outputs:
Yes– This output sets the Plan Status icon to green.Unknown– This output sets the Plan Status icon to yellow.No– This output sets the Plan Status icon to red.Blank– This output sets the Plan Status icon to blank.
TeamView supports up to ten Plan Status fields at a time, so potentially the Plan Status column in TeamView can show up to ten icons. However, we recommend that you limit the number of icons to six.
(You can remove preconfigured Plan Status icons to make room for additional custom icons.)
Suppose that you want to set up a custom Plan Status icon that indicates whether the opportunity has a Compelling Event (based on the answer given to that particular Assessment question in Opportunity Manager).
One way you could set this up is as follows:
- Use Summary Rollup fields on the Altify Opportunity object to record whether a specific answer option has been selected on that particular Assessment question.
- Query the values in these Rollup fields (each one can be 0 or 1) using a custom Formula field.
The color of the query icon is determined by which Rollup field has the value 1.
Get the Record ID of the Compelling Event Question
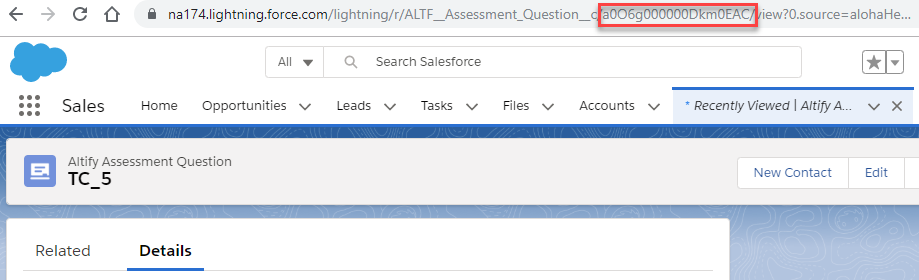
Begin by obtaining the record ID of the 'Compelling Event' assessment question.
- Open the Altify Assessment Questions tab in Salesforce. (If this tab doesn't already exist, you'll need to set it up first.)
- Open Compelling Event.
- In your browser's address field, copy the ID of this assessment question and store it in a convenient location.
(This ID is unique to your org. The ID shown here is just an example.)
Create Rollup Fields for "Compelling Event" Answers
TeamView requires a Plan Status field to have the following possible Text outputs:
YesUnknownNoBlank
An assessment question can have the answers Yes, No, and Unknown.
Using Rollup fields and a Formula field, you can associate each answer to one of the signal field outputs, and associate the lack of an answer with the Blankoutput.
To create the Rollup fields:
- In Setup, open the Altify Opportunity object.
- In the Fields & Relationships section, click New.
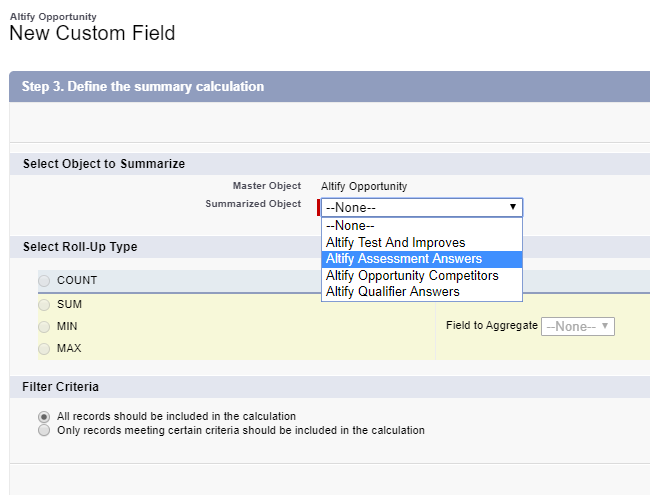
- Select Roll-Up Summary, and click Next.
- This field will check whether the Compelling Event question's answer is Yes. Give the field a suitable label, such as Assessment Yes.
- Give the field a suitable API name.
- Click Next.
- In the Summarized Object drop-down, select Altify Assessment Answers.
- Select the COUNT radio button.
- Select Only records meeting certain criteria....
- You need to specify two criteria:
- Assessment Questions ID equals ['Compelling Event' record id]
- Answer equals Yes
- Click Next, and Next again.
- Click Save & New.
- Repeat the process twice more to create similar Rollup Summary fields with the following criteria:
- Assessment Questions ID equals ['Compelling Event' record id]
- Answer equals No
- Assessment Questions ID equals ['Compelling Event' record id]
- Answer equals Unknown
The record ID is the one you stored earlier.

'Assessment No' field:
'Assessment Unknown' field
Create the "Signal" Field
Next, you create a "signal" field that makes use of the three Rollup summary fields. The signal field will have four possible text outputs.
- In the Altify Opportunity object's Fields & Relationships section, click New.
- Select Formula.
- Click Next.
- Enter a suitable field label, such as Compelling Event, and a similar API name.
- Specify Text as the return type.
- Click Next.
- Enter the following formula :
- Click Next, and Next again.
- Click Save.
IF(Assessment_Yes__c > 0 , 'Yes',
IF (Assessment_No__c > 0 , 'No',
IF (Assessment_Unknown__c > 0, 'Unknown',
'Blank'
)
)
)

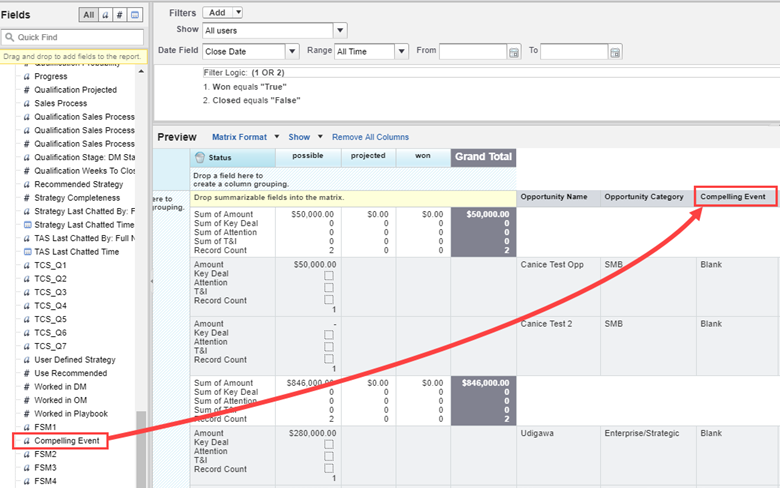
Add the Signal Field to Reports
Now that the signal field is created, add it to the report type and report that underlie every view in which you want the signal to be shown.
For any view that should not display the custom signal, omit the field from the underlying report.
Associate the Signal Field With a Plan Status Icon
To associate the signal field with a Plan Status icon, you specify the signal field's API name in Custom Settings.
- In Setup, go to Custom Settings.
- Click Manage beside Altify Core Settings.
- Click Edit.
- In the next available Signal field, specify the signal field's API name.
- Click Save.
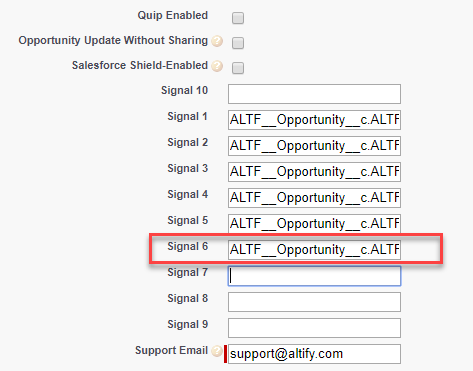
In this example, the API name is ALTF__Opportunity__c.ALTF__Compelling_Event_Signal__c, and it is associated with the sixth signal icon.
Hide the Signal on Irrelevant Plan Types
If it is the case that the custom signal is irrelevant to a particular opportunity plan type (because the signal is based on data excluded from opportunities of that type), you will probably not want the signal icon to be shown for opportunities of that type.
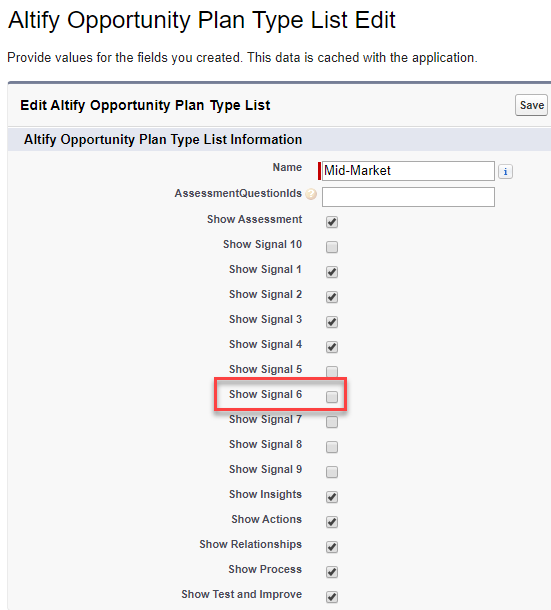
In this example, the custom signal is irrelevant to Mid-Market opportunities because the Compelling Event assessment question is not available on those opportunities.
To hide the signal icon on those opportunities:
- In Setup, go to Custom Settings.
- Click Manage beside Opportunity Plan Type List.
- Click Edit.
- Deselect the Show_Signal6 checkbox.
- Click Save.
The extra Plan Status icon is now shown in all TeamView views.
It is hidden for Mid-Market opportunities, but is shown for the other opportunities in this example:
Specify Hover Text for the Custom Plan Status Icon
The user sees help text when they hover over a Plan Status icon.
In the case of any custom Plan Status icons you add, you need to update the relevant custom labels to specify the text that should be shown on hover. These custom labels are:
CustomLabel.FSM_SIGNAL_HELP_6CustomLabel.FSM_SIGNAL_HELP_7CustomLabel.FSM_SIGNAL_HELP_8CustomLabel.FSM_SIGNAL_HELP_9CustomLabel.FSM_SIGNAL_HELP_10