Account divisions allow you to mimic the buying structure of a large organization without the need to create and manage additional Salesforce Account records. Opportunities can then be assigned to divisions and followed up using division-specific insight and relationship maps.
Account divisions are created in the Altify Account Grouping Editor, which is accessed via the Account Structure tab in the account plan settings.
To create divisions, do the following:
-
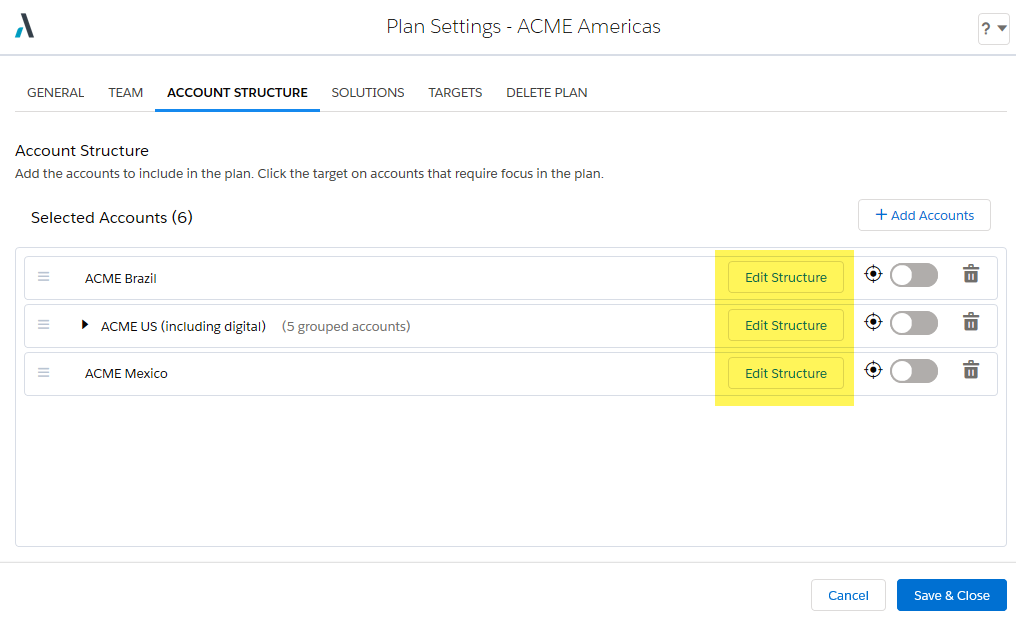
On the Account Structure tab, click the Edit Structure button on the row for the relevant account.
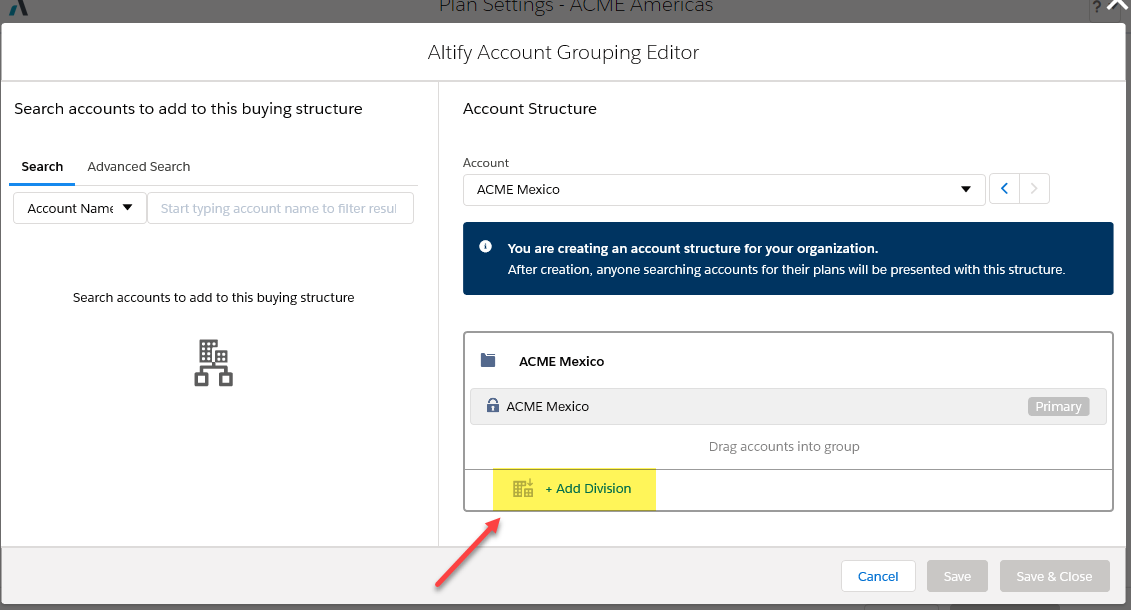
The Altify Account Grouping Editor is displayed.
-
Click Add Division to add each division.
-
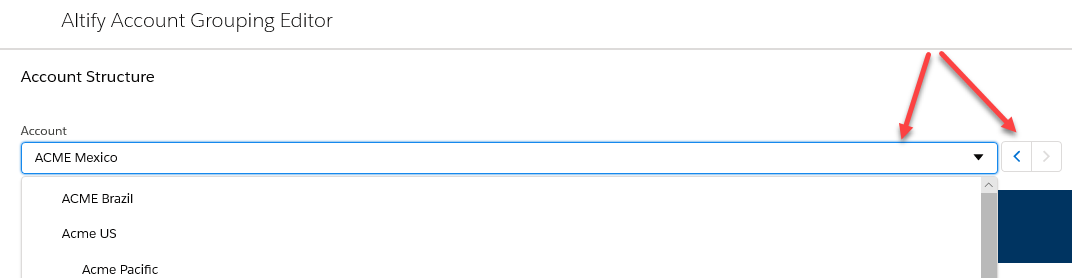
You can create divisions for other accounts in your plan without leaving the Altify Account Grouping Editor. To go to another account that is included in your plan, use the drop-down menu or click the arrow buttons - as indicated below.
-
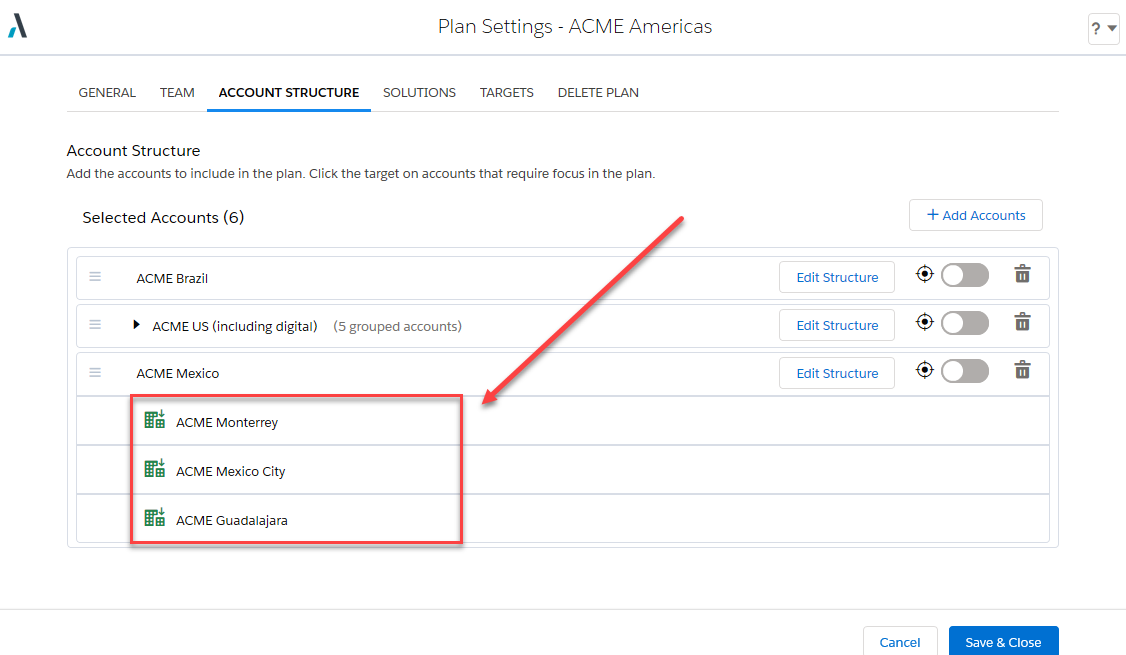
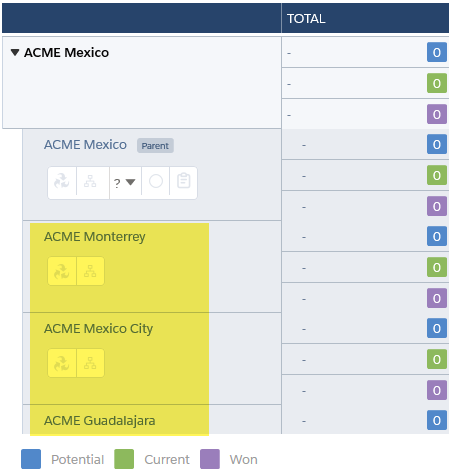
Click Save & Close to return to the Plan Settings screen when you have finished creating divisions. Your divisions are now visible on the Account Structure tab and are distinguishable from accounts by the green icon.
On the opportunity map, you will be able to do the following on rows displayed for your divisions:
- Create and view opportunities for the division.
- Access a dedicated insight map for the division.
- Access a filtered view of the relationship map that only displays contacts from the relevant division.
Note: Any divisions you create apply to your whole org. Using the above example, if another user creates a new account plan and selects Acme Mexico, it will automatically include its divisions. The same applies when a user removes an account division.