One of the options you get in TeamView's data selection area is to select a team of users.
Summary totals are shown for the members of the team that is currently selected.
The Team drop-down (pictured below) includes:

- Teams you have created.
- Public teams that have been shared with you (or are accessible to all TeamView users).
- A Team with just you as a member ('Me') to view your own pipeline data.
Creating, editing or deleting a team
To create, edit or delete a team, do the following:
Click the Team Settings button (indicated below).

The Team View Settings dialog opens.
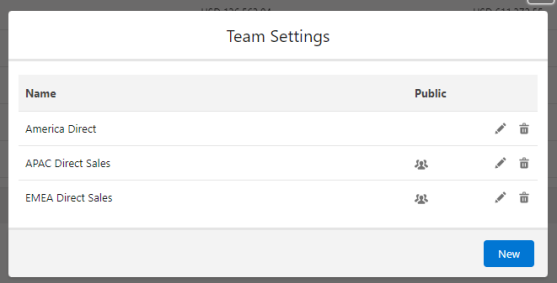
Listed are the teams you have created and public ![]() teams to which you have access.
teams to which you have access.
Select one of the following to continue:
Creating a new team
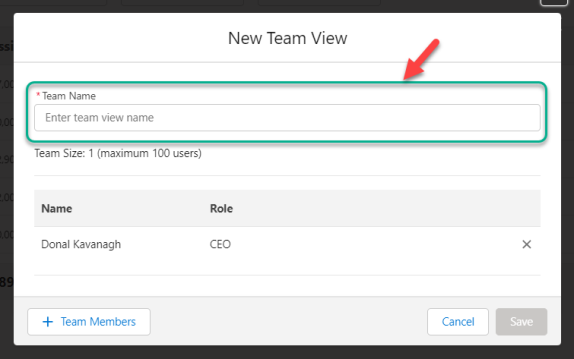
- On the Team Settings dialog, click New.
- On the New Team View dialog, enter a Team Name (as indicated below).
-
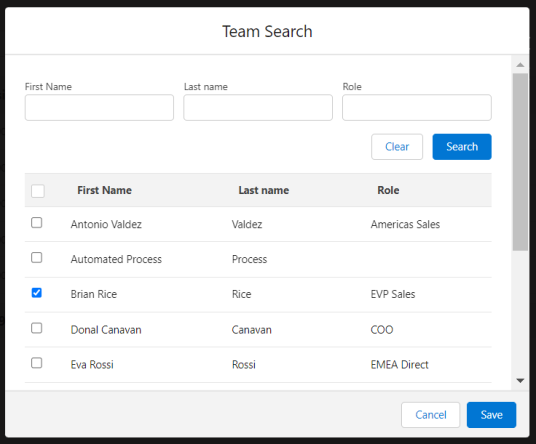
Click + Team Members to begin adding team members.
(You are added to the team by default - click the X to remove yourself).
-
In the Team Search dialog, you can search and select the users to add to the team.
- Click Save.
- Click Save on returning to the New Team View dialog.
Your team has been created. By default, it is only visible to you (as the team owner). You can share access by making it public.
Editing a team
- On the Team Settings dialog, click the team's Edit icon
 .
. -
In the Edit Team dialog (shown below), you can do any of the following:

- Update the Team Name (see 1 above).
- Remove a user from the team by clicking the relevant X icon (2).
- Click + Team Members to add more team members (3).
- Click Save.
Note: If you have only been granted read access to a public team, you will not be able to save any changes you make. Contact the team owner and request that they share the team with you and grant read/write permission.
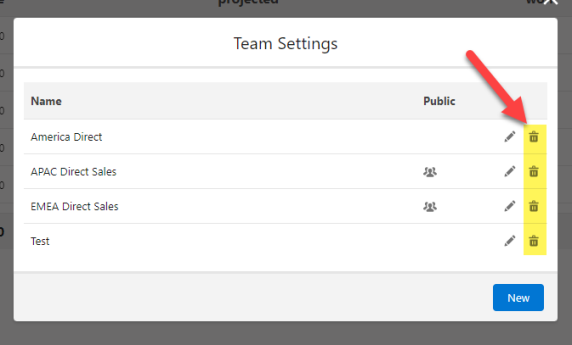
Deleting a team
- On the Team Settings dialog, click the relevant Delete icon
 (highlighted below) to delete a team.
 - Click Delete to confirm that you want to delete the team.