You can refine the data displayed in a view using filters.
Each filter has one or more criteria that match against opportunities. These criteria combine on an AND basis.
Your administrator can set up quick filters for your use. These can help you to quickly apply particular business rules to the data.
You can also manually set up and apply custom filters.
This topic covers the following areas:
Applying your own custom filter
To apply your own custom filter to the TeamView data:
-
Click the Filter button (indicated in the image below).

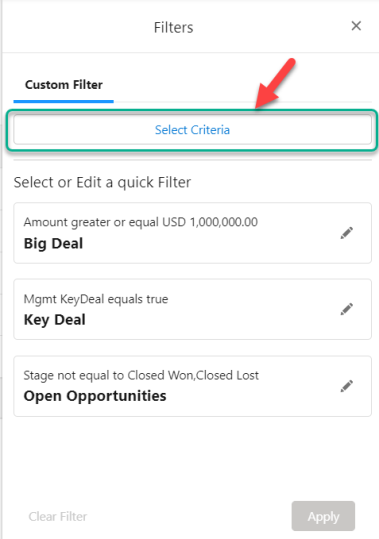
- In the Filters side panel, click Select Criteria (indicated below).
- In the Add Criteria pane, select a field to base the first filter criterion on.
- Select a comparison operator, such as equals or less than.
- Specify what value to compare the field against.
-
Click OK.
Your initial criterion should look something like this:
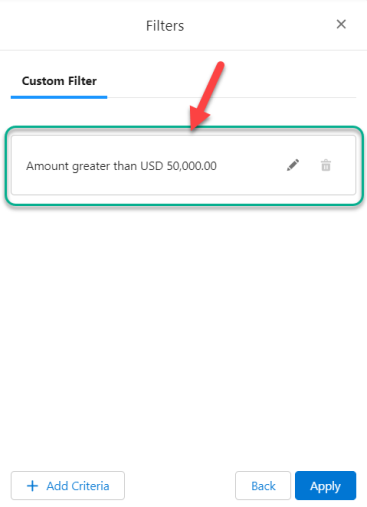
The criterion can be updated if required (click the edit icon
 ) but cannot be deleted (
 ) until a second criterion is added.
 -
If you want to add another criterion, click + Criteria, and repeat the steps above.
Note: Filter criteria are applied on an
ANDbasis - so if, for example, you add two criteria, only opportunities that meet both criteria will be displayed. - When you have specified all the criteria you need, click Apply.
This can be any of the date, text, checkbox, number, or picklist fields available in the view that is currently open.
The custom filter is applied to your data selection. Currently applied filter criteria are displayed above the summary totals section (as indicated in the example below).
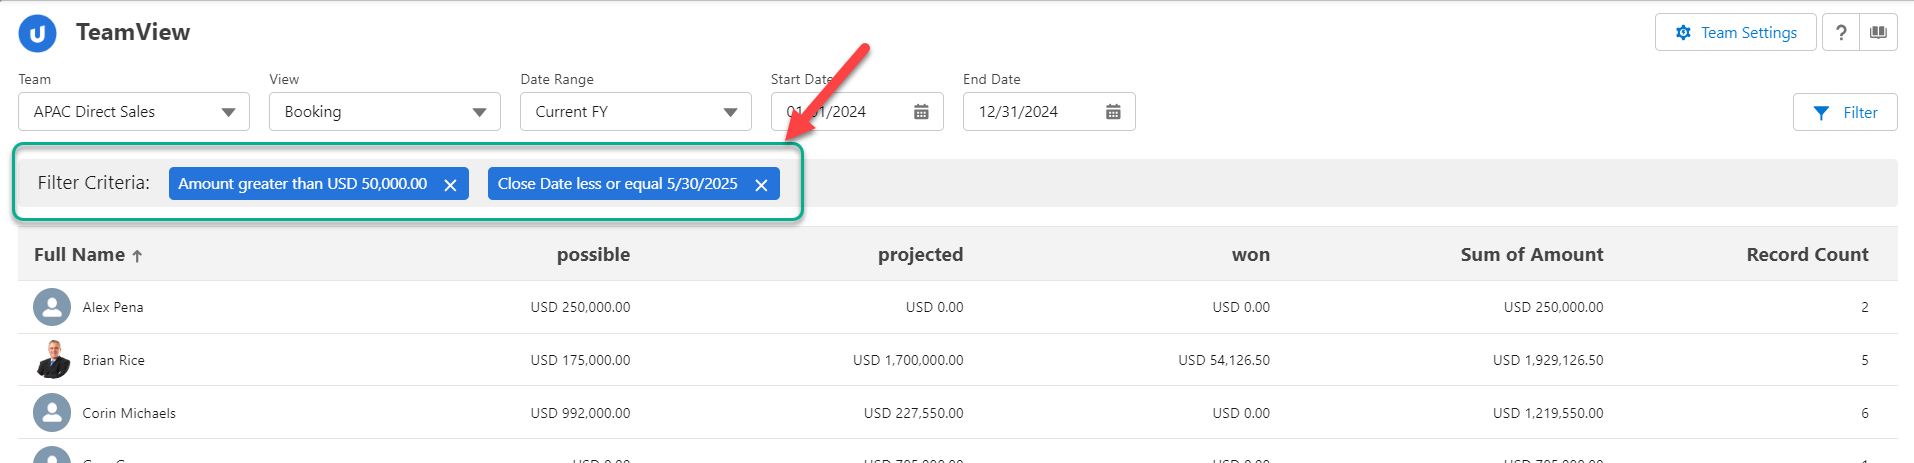
To remove a filter criterion in this view, click the X - as shown in the example below.

Note: Custom filters are saved in Salesforce local storage. If you 'unapply' the filter, it is no longer available to you.
Using quick filters
Your administrator may have added quick filters to TeamView for your use.
These can be a useful way to quickly apply business rules to your data selection.
To use a quick filter:
-
Click the Filter button (indicated below).
-
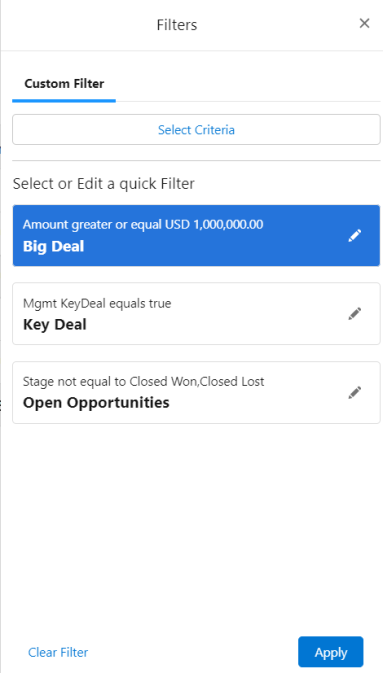
In the Filters side panel, select the appropriate quick filter under Select or Edit a quick Filter.
In the example shown below, three quick filters are available for selection: 'Big Deal', 'Key Deal' and 'Open Opportunities' - and 'Big Deal' is currently selected.
-
You can make changes before applying a filter (otherwise, precede to step 4)
To update the selected quick filter before applying, click the Edit icon
 . Your alterations do not change the quick filter itself - just the criteria you will apply to your data selection.
 -
To remove a criterion, click X (this is only possible if there is more than one criterion).
-
To add a criterion, click + Add Criteria and then specify the criterion details.
-
To adjust a quick filter criterion, click the pencil icon
and make the necessary changes. - Click Apply.
The quick filter is applied to your data selection. You can see the filter criteria at the top of the summary totals section (as indicated in the example below).
To remove a filter criterion in this view, click the X - as shown in the example below.
Altify Administrators can create quick filters. For more information, see Creating a Quick Filter.
Filters in a multi-currency org
In a multi-currency org, if you set up a filter criterion based on a currency field, the filter interprets this as being in the org's base currency.
So, for example, suppose that the base currency is the dollar, and a particular opportunity's currency is Sterling.
The filter compares against the dollar value of the opportunity, rather than the Sterling value.