Details Tab (Contact Information Panel)
The Details tab shows is where you can add depth to your contact information and access helpful resources.
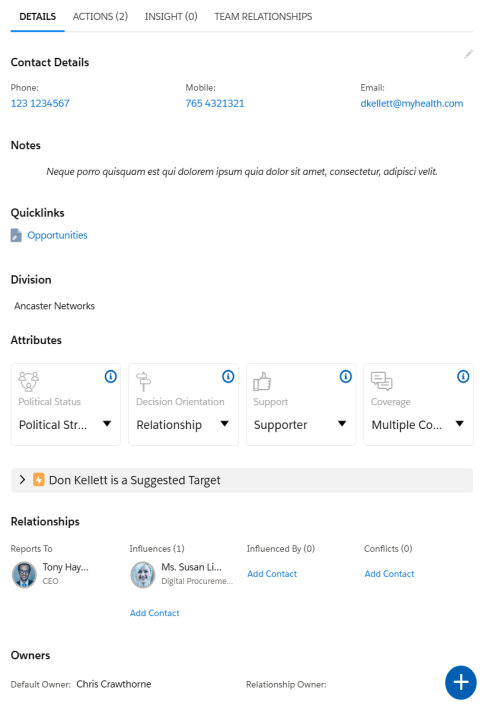
The Details tab includes the following sections:
Contact Details
The contact's phone and mobile numbers, and email address. This information is automatically pulled from the Salesforce Contact record.
To edit the contact details, click the pencil icon to the right of the three fields. Depending on how your administrator has configured Altify, you are prompted to edit the information inline or the Salesforce Contact record is displayed for you to update.
If any of the fields are mandatory on your org's Salesforce Contact records, the same will apply here.
Notes
Here you can add research notes about the contact. You can include links to other information.
Quicklinks
This area contains links to useful resources. These links are created by your organization and can include custom pages that reference data associated with the currently selected contact. For more information, talk to your administrator.
Division [account relationship maps only]
The Division area allows you to assign the contact to one or more divisions of the buying structure. Once assigned, the contact becomes visible in the relevant view (or views) of the relationship map (see Viewing Division Contacts (Account Maps Only)).
The drop-down menu also allows you to remove the contact from an assigned division. (This is also possible via the power menu on the relevant contact card when you are viewing the division in question).
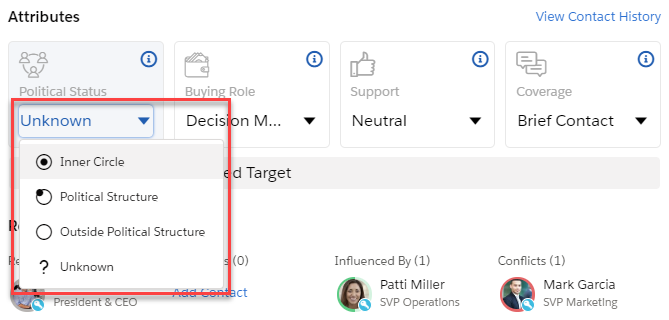
Attributes
The Attributes area gives you two ways to set the contact's relationship attributes for this map.
If you're new to relationship maps, you may prefer this to setting relationship attributes directly on contact cards.
-
Use the drop-down menu to select an option.
-
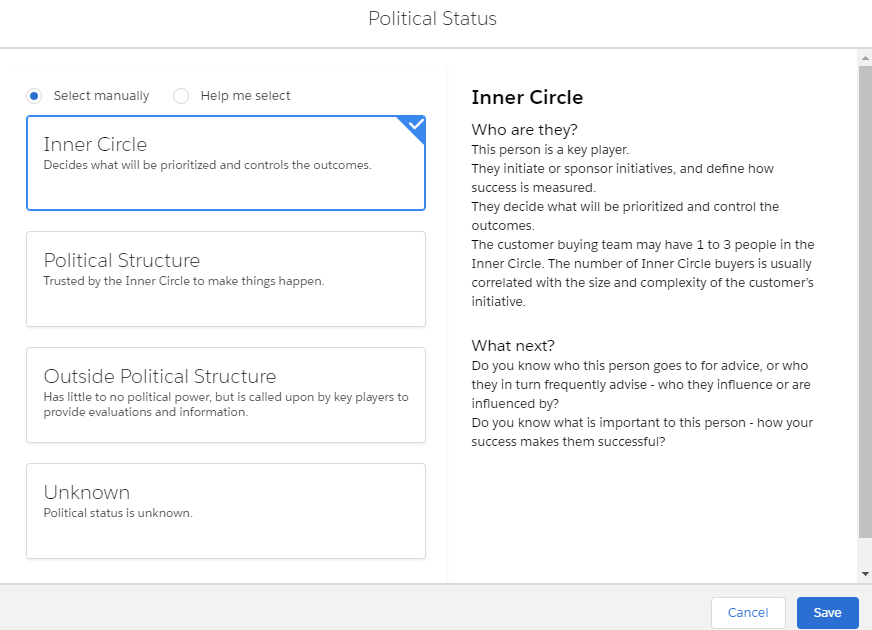
Click the tile to get guidance from the software on what option to choose.
You can review full definitions of each available option. Or, if you want even more guidance, use the Help me select radio button. You're then guided through a series of questions about that contact that will give you the software's assessment of the most appropriate option.
View Contact History
The View Contact History link gives you relationship details about the contact from other relationship maps related to the same account (this can include the account relationship map itself and opportunity relationship maps related to that account).
Suggested Target
The software automatically identifies contacts that the sellers need to move the needle with. If the contact currently selected on the map is one of those, they're flagged as a suggested target, and you get coaching in the information panel on how to elevate your relationship with them.
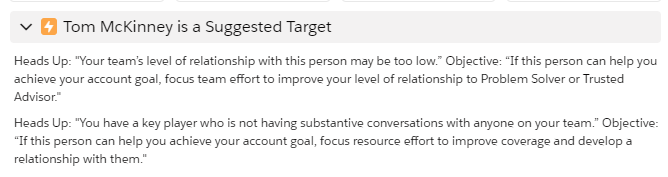
If a contact is a suggested target, an orange icon is shown on their contact card in the map.
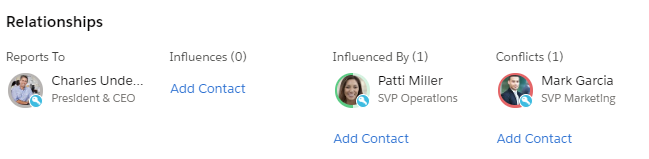
Relationships section
The Relationships section summarizes the reports-to, influence, and conflict relationships the contact has on the map.
You can add or remove relationships from this location.
-
Click Add Contact to add a relationship of the relevant type.
-
Hover over a relationship and click the trashcan icon that is displayed to remove a relationship.
Owners
This section shows you the owner specified in the Salesforce contact record – the "default owner".
You can also click Relationship Owner to specify the user who owns the relationship with this contact (in the context of this particular account or opportunity).

You can include the Relationship Owner field on your contact cards if required.
Other
Your administrator can configure relationship maps so that additional fields are shown in the Other section.
So if there are contact details that are particularly important to your company's relationship map users, the administrator can add them to this section. (And in turn, you can display them on the contact cards or use them to filter your relationship map).